February 19, 2016

Electrical Parts Swapping

While reviewing my battery relocation diagram and checking it against various references two potential issues came to my attention. The first was that I was going to need a different remote starter solenoid relay.


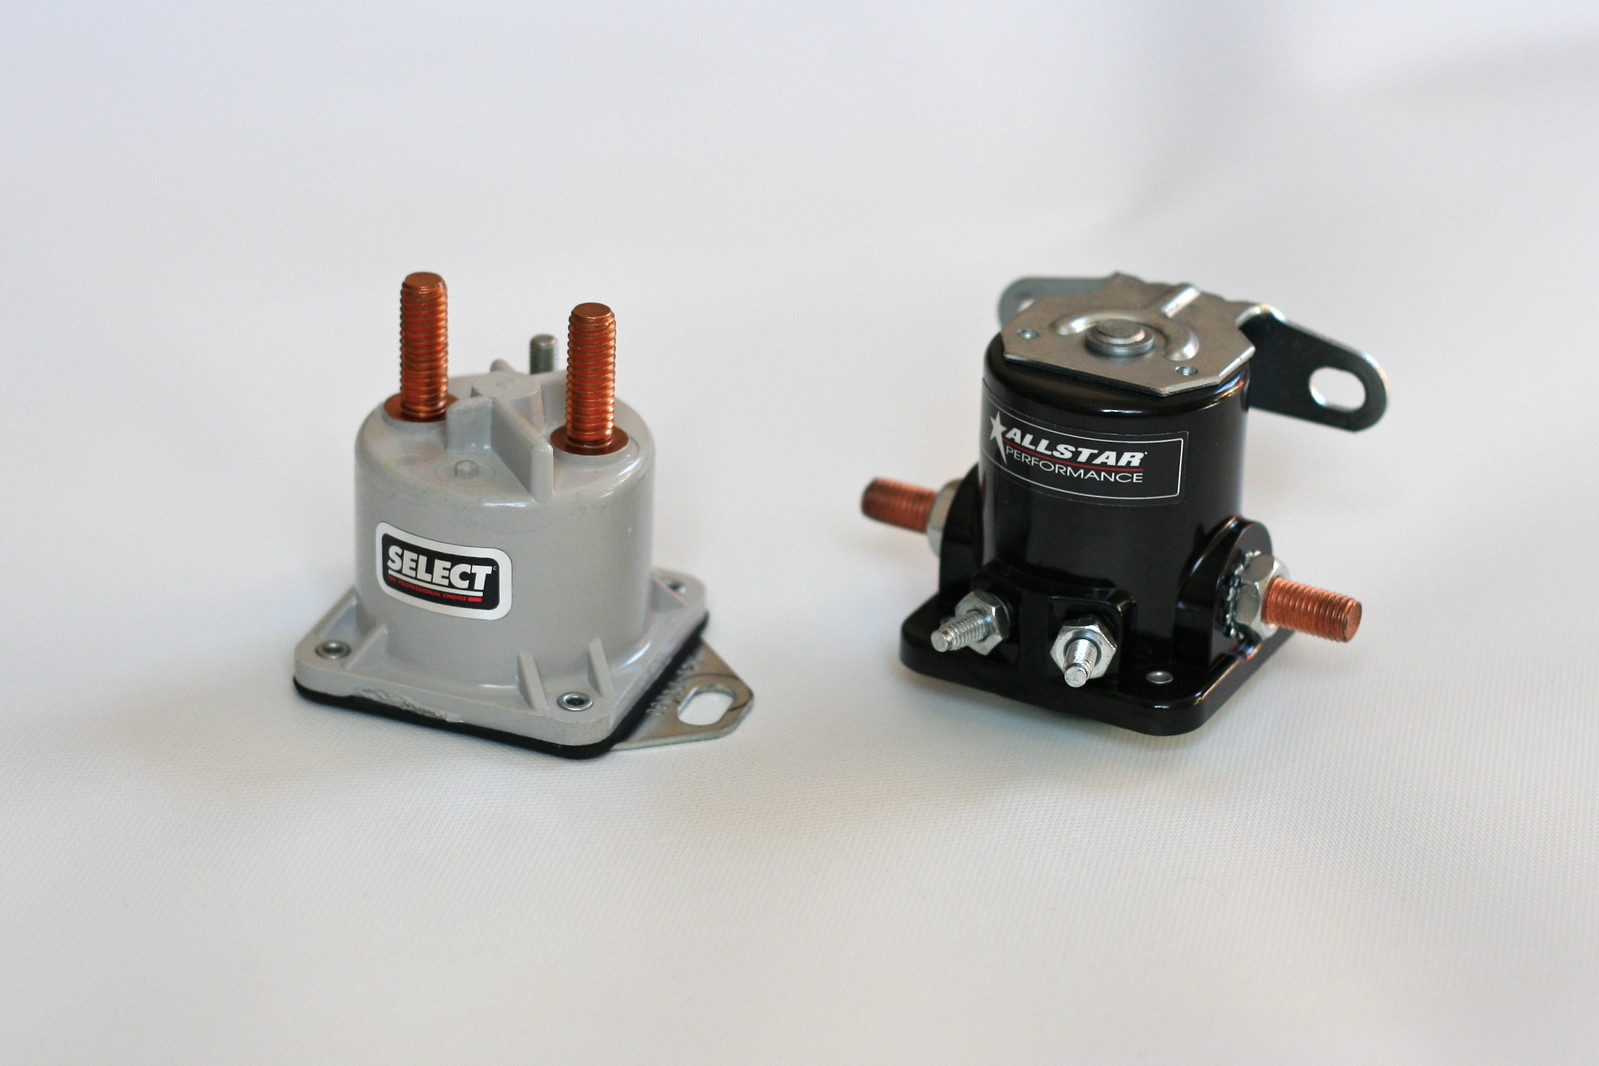
Shown above right is the outgoing Allstar Performance solenoid (part #ALL76203) with its replacement, a Borg Warner "Select" solenoid (part #S5048), on the leftBoth are examples of a remote starter solenoid relay, commonly referred to as "Ford-style" due to the automakers use of fender mounted units. For many years the small-block/big-block Chevy crowd have implemented these as a solution for "hot start" issues, a condition where the starter is slow to crank due to heat-soak-induced electrical resistance. Of course on a Saturn S-Series LLO this is a non-issue (more on the remote solenoid "hot start" remedy can be found at the Crankshaft Coalition Wiki). When laying out my battery relocation I chose to include a remote solenoid as safety measure. By function a remote starter solenoid relay is only energized when the starter switch is engaged, bridging the connection between the battery and starter. What this ultimately means is that the cable run from the solenoid to the starter will only be live while cranking.

February 13, 2016

Oil Catch Can, Ready To Install

I brushed the dust off of this finished component for a photo-op. At long last, presenting the catch can in all of its powder coated glory.


I won't bore the audience by throwing even more text at this subject (for anyone just joining us, more information on the catch can is viewable in the "Preview" and "Welded Up" posts). Keen observers may notice that the filter has color shifted from white to red. As evidence of time lost during the project's hiatus, K&N started turning out their smaller line of filters with a synthetic media similar in color to AEM's "Dryflow" air filters. I would be lying if I claimed to have made the switch for any reason other than my intake and catch can matching.

January 21, 2014

A Touch Of Refinement

I decided to (temporarily) add a bit of creature comfort back into the gutted interior.


Years ago I located a really clean '94 SL2 in a salvage yard while scrounging up some parts for a prior Daily Junky. The car was a well optioned plum metallic example with a gray interior. If I remember correctly, its life on the road had been cut relatively short by a grenaded transaxle which (overlooking the mechanical failure) left everything in shockingly good shape, especially for a New England car. I took advantage of the opportunity to pull a few extra things for my own '94, including the inner front door panels. After sitting on them for reasons I cannot remember, it was time to dig them out and drop them in place. Several years of being shuffled between less-than-ideal hiding places had left them in need of a major cleaning. Each panel was fully disassembled to ensure that no spot was left untouched. Pictured above are the panels after detailing and prior to reassembly.

May 28, 2013

Electrical Component Preview

One of the last projects standing in the way of turning the key (as well as seeing if all of my wiring was done correctly).


Like my other wiring projects, this one has served as an in-depth lesson in automotive electrical systems. And like everything else with this build, a project as simple as relocating a battery quickly snowballed. It seems to be common practice for batteries to migrate from the stock location (the engine bay in a Saturn S-Series) to the trunk. However, a known water leak made me weary of placing the core of the electrical system back there. With the rear half of the car empty I had plenty of room for an alternate setup. Power will come from an Odyssey PC680 dry cell battery, chosen for its smaller dimensions and positive track record with other Saturn builders. Accompanying the Odyssey are some additional precautionary components (pictured below from left to right):

May 10, 2013

Another Length Of Exhaust

Already done is the next 3' (a little under actually, measuring at 33") of the exhaust system.


I'm going to call this piece the midpipe, the portion of exhaust that includes a flex section and the catalytic convertor. The flex section is a Vibrant item, 6" in overall length with a 3" in diameter and an interlocking liner while the catalytic convertor is a metal core unit, also from Vibrant, with a matching diameter and 10" overall length. To help tuck the exhaust system up under the car, I utilized two 15 degree bends. Everything is 304 stainless steel, of course! The final length of the assembly is entirely random. To keep the catalytic convertor a little closer to the front of the car, I shortened the leg of the bend right before it. The length after the catalytic convertor comes from the longest piece (6.5") of extra tubing I happened to have kicking around. It was an early decision to make this area of the exhaust system its own sub assembly, not only for a less cumbersome solo installation, but to make transport to the welder a little easier for the remaining (and now shorter) exhaust system. The last remaining detail is a hangar to utilize the stock hangar arrangement. I won't be designing that until the rest of the exhaust is ready and I can do all of the hangars in a batch.

May 05, 2013

Oil Catch Can, Welded Up

It took a few trips, but the catch can is all fried up!


I actually fell a few steps back after discovering that my spacing for the internal baffling put the bottom most disc right in the way of the oil drain fitting. This wouldn't had been a big deal, except for making the discovery after having the aluminum nuts tack welded into place. Needless to say, I was at least able to save the perforated discs. Another order with McMaster Carr later, and I had a new and improved version of the baffling - this time I opted to loctite the top nut into place, and eliminate the bottom nut by having the stem of the assembly welded to the base of the catch can. 

May 01, 2013

Downpipe Revisited

Sometime in February I discovered that the downpipe wasn't quite done yet.


Embarrassingly, I had a bit of an oversight with my placement of the oultet v-band flange when I originally fabricated the thing. As I found it, where it ended up next to the oil pan, was too tight to get the v-band clamp on. How I didn't see this the first time I'm not sure, but after a face-palm, some choice words, and removing the wastegate/dump tube assembly the downpipe was back out again. To remedy the problem involved extending the length by 6" to push the flange out into a more open area. Fortunately I had plenty of spare material kicking around, although it meant sacrificing the v-band flange that was on there. The extra length did create another situation however. In the same fashion as a stock Saturn downpipe, I had wanted to add a bracket to secure the exhaust against the two rearward most mounting points of the transaxle-motor brace. Originally I was going to save this additional bracket for the next length of exhaust, but since the downpipe was now passing under these points I would be adding it to the extension.