September 07, 2012

Bumper Trimming

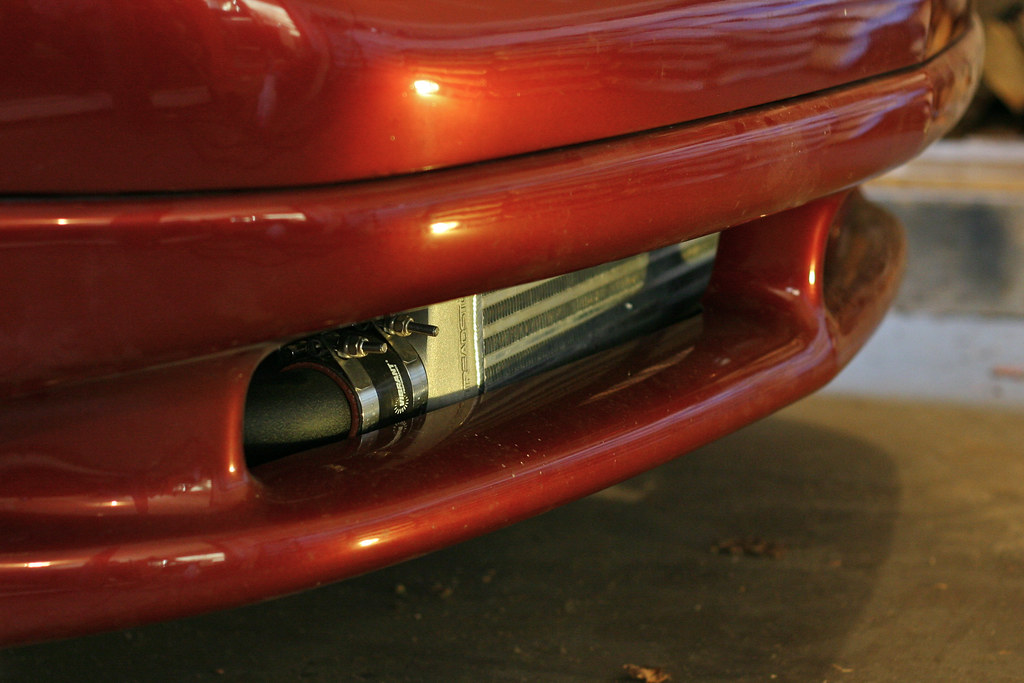
As mentioned in an older post, the nose of the car would no long fit over the intercooler.


To remedy this required some trimming of both the bumper and lower reinforcement (I was certain that I had taken pictures of the modified reinforcement, but have been able to find them). The lower reinforcement is a plastic piece that used to include the grill (cutting this out was one of my earlier modifications) and simply holds the lowest portion of the bumper in place. To clear the intercooler I ended up cutting away a majority of it. 

July 25, 2012

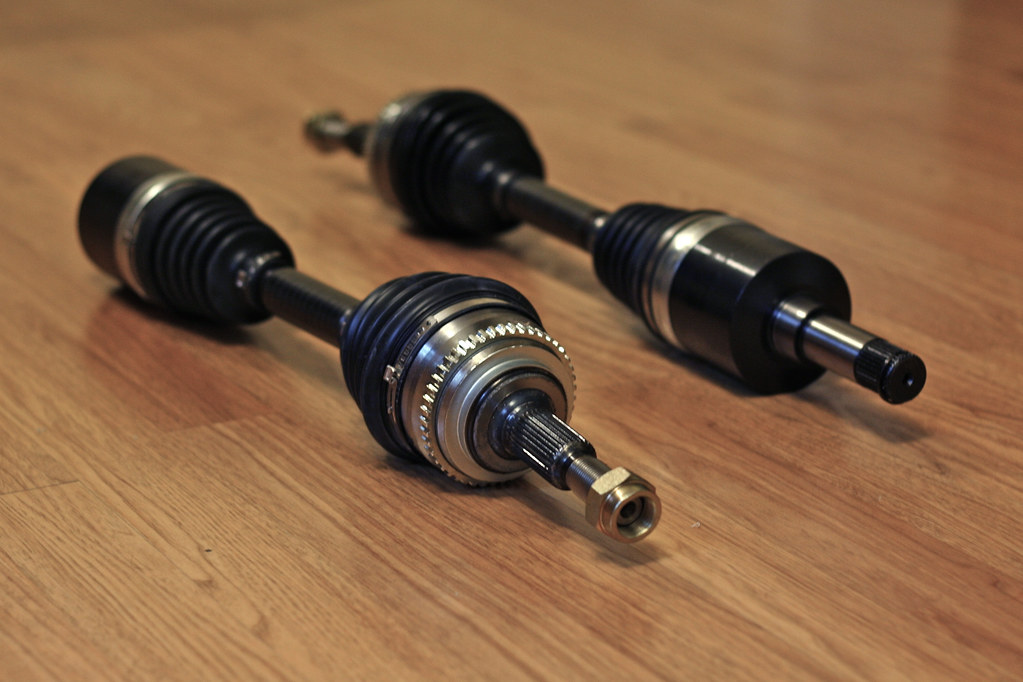
New Axles

A few weeks ago the car donated another perfectly good part to keep downtime with the daily to a minimum.


On a drive home from Portland, ME (about 35 minutes north of my home in Wells) the passenger side front of the SW started exhibiting a vibration at speed, with a distinct clunk every time the clutch was engaged or depressed - a bad CV joint loading and unloading. I was short on time with a looming alignment appointment, so I jacked the SL2 up and swiped the passenger side axle to get the daily squared away. I turned this into an excuse to purchase a new set of axles for the SL2. Given the mileage on the SW I'd gamble the drivers side axle may not be far behind its counterpart, so a fresh pair on the SL will leave me with a good axle left over (hopefully I won't need it anytime soon). Replacement axles for these cars have always been hit or miss as a lot of the reproduction units have inconsistencies. In a lot of instances the CV boots are larger than stock, making them prone to rubbing on various areas of the drivetrain or chassis. I did my homework to narrow the field down to axles others have been successful with, and ended up purchasing a set of EMPI axles through Rock Auto.

July 22, 2012

Vented Cam Cover Preview

This is another long-term project that is finally coming to a close. Once again I've gone overboard for a stock motor build, but I couldn't help myself.


This project started as another "might as well" moment. I knew at the very least I wanted an aluminum cam cover with the full "Twin Cam 16V Saturn" script that was found on the '95 DOHC's for that year only ('94 and early only said "Saturn" while '96 saw the introduction of composite cam covers). Years ago a local Sixthsphere member turned one up for me, only to sit around in the trunk of the car while I tackled other portions of the build. With the intention of getting the car to run this year, I finally unearthed it. By this point I had it in my mind that I was going to build a vented cam cover. I poured over various applications (namely Honda B-series and Mitsubishi 4G63's) for ideas to determine an adequate size and placement of a pair of male AN fittings before choosing -10AN. For some time after I continued to toy with various locations for my fittings until I settled on mimicking the two other vented S-Series cam covers that I knew of - already proven to work right?

June 15, 2012

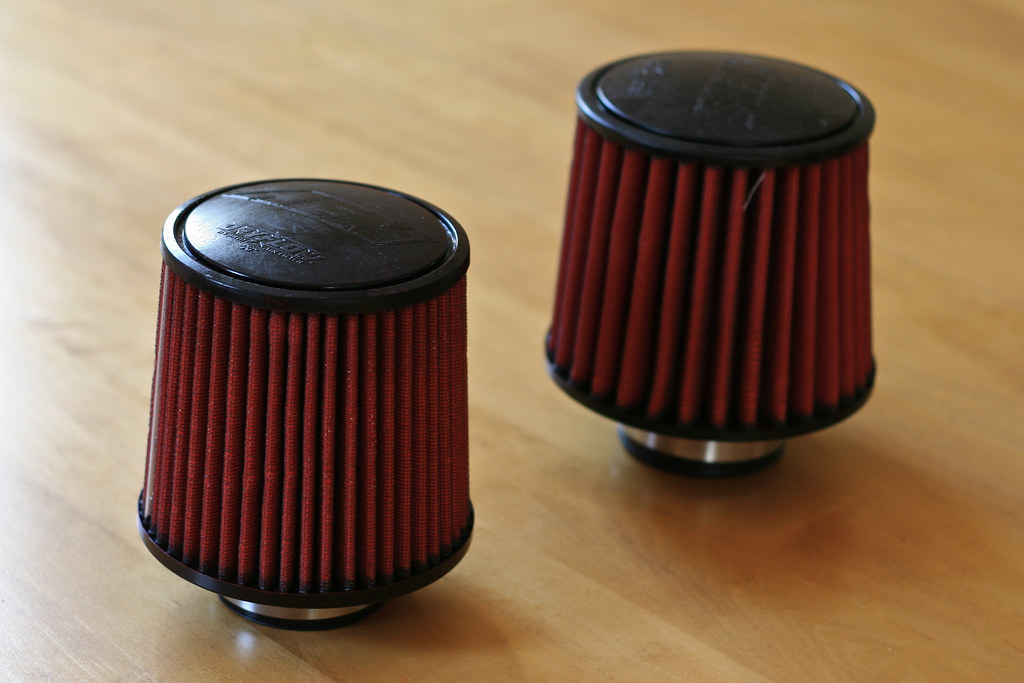
AEM Air Filter

Not the most thrilling update, but a necessary detail.


When I designed my intake I mocked up an old oiled AEM filter that was sitting around with an unused AEM cold-air intake. Being that the filters location is in such a tight spot, it was useful not only in designing the route of the tubing, but in ensuring the hood would close. Satisfied, I went ahead and ordered a new dry filter of the same dimensions. When this dry-flow filter arrived I was disappointed to discover it was marginally larger than its oiled counterpart. A test fit confirmed that the first unit would not allow the hood to close without interference. So I went back to the catalog and did some digging around to find a filter that was approximately half an inch smaller in length and overall diameter. This actually worked out quite well as the new AEM dry-flow filter provides better clearance than even the oiled mockup filter. As an added bonus I kept the larger dry-flow filter for whenever I refurbish that AEM intake for the daily.

May 31, 2012

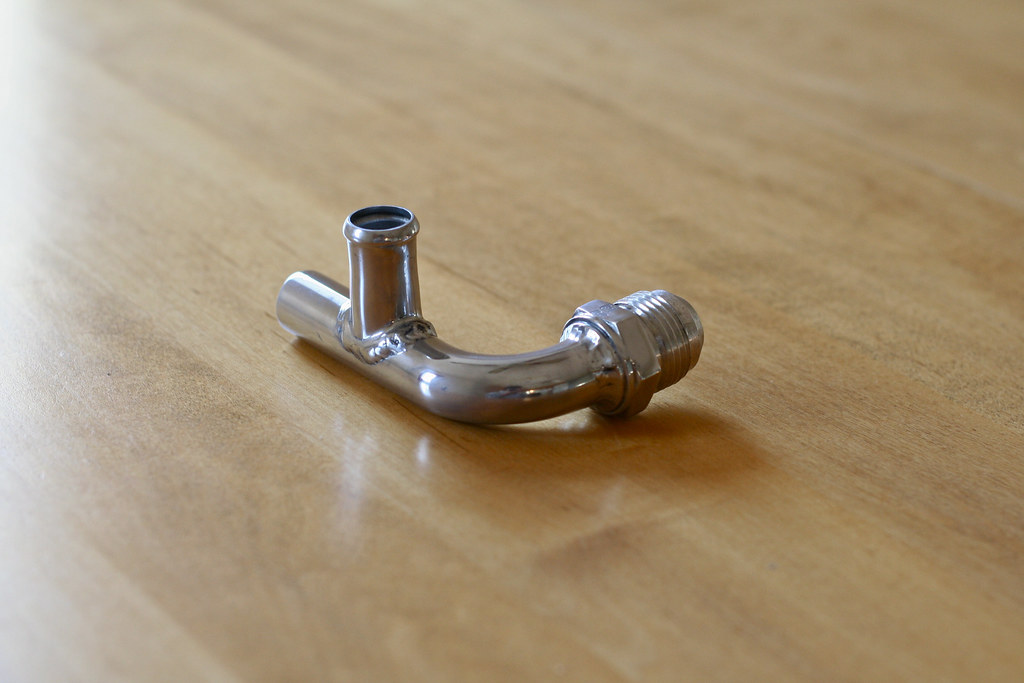
Coolant Junction Pipe

An elaborate solution for a simple problem, all because I didn’t want a coolant bypass hose touching the intake.


When I first mocked up the turbocharger, with my new manifold, it was clear that its position was going to interfere with the original route of the passenger side hoses. The lower radiator hose was modified first, being shortened somewhat, while the thermostat housing was cut up and welded back together. The hose right below it (the one that connects the block to the hardline on the passenger frame rail) was initially shortened so that it ran a little closer to the motor, meeting my original need of clearing the turbo (it can be seen in a picture in this post). Later on while fabricating my intake, it became an issue again, rubbing against the tubing. Being that it wasn’t the best solution in the first place (the molded hose ended up a bit kinked) I started playing with alternatives. Because the hose was trying to make a 45 degree turn off of a straight fitting (on the block) I first tried replacing the stock fitting an Earl’s 45 degree swivel fitting (this required an XRP metric to AN adapter).

May 19, 2012

Front Brake Refresh

This update probably isn't quite as exciting in the grand scheme of things, but it needed to be done. The car had been sitting without front brakes since last summer.


Long story short - I was doing a routine rotor/pad job on the daily and twisting apart sliding pins. Since the SL2 had so few miles and no inclement weather on its brakes, I knew that these parts were definitely good. So, being that I was in a pinch, I ended up "borrowing" the pad cradles and pins, hanging the front calipers in the wheel wells, and that is how she had sat since. Recently I collected new replacement pins, boots, and pad shims to put everything back together. Since everything was coming apart I took the chance to repaint the calipers and FINALLY install my front Goodridge lines. My first task was to get the pad cradles into shape. These, being leftovers from a year round car, were pretty nasty and very crusty. I took them down to good metal with a combination of wire wheels and wire brushes. After a thorough followup cleaning I coated them in Eastwood products - two coats of rust encapsulator and two coats of chassis black. The calipers had been previously painted with Rustoleum satin black, however when I first installed them I did a poor job containing the brake fluid and it wreaked havoc on the finish. After disconnecting the calipers and thoroughly flushing them out I attacked them the same way as the cradles. While these items were curing I set about getting ready to install my Goodridge lines. For weeks I had been applying PB Blaster to the flare nut that connects the hardline to the soft to try making the disconnect as painless as possible. The passenger side came apart with little persuasion, but the drivers side became a headache. I was able to get the stock rubber line unthreaded with some additional heat but the flare nut remained frozen the hardline. Ultimately this made reassembly kind of tricky and the final orientation of the drivers side brake hose isn't perfect. I had a little additional downtime refinishing the L-brackets that keep the brake lines in place, as I couldn't get myself to install fresh Goodridge lines into rusty brackets, but got everything back together today.

May 02, 2012

Oil Filter Relocation

This is another project fresh off the back burner... if you can believe that. Why did I go through the trouble? I won't deny that I totally did it for cleanliness reasons.


In an earlier post I described the finish work and alterations I made to the adapters from a Trans-Dapt oil filter relocation kit. I fully expect some criticism for the final orientation of the oil filter, being that the open end is pointed down. Since this project had always been off to the side I'd never committed to any one spot for the filter to reside. I was a little troubled by the lack of space and the hose provided with the kit wasn't exactly the most flexible in the world. One area that had caught my eye was the real estate left behind by the power steering pump and reservoir. Given the nature of the oil feed and return lines, I began looking at the possibility of mounting the filter upside down, essentially making the hose run vertically. Before I embarked I had to lay my skepticism of a turned over oil filter and spent quite a bit of time wading through other setups. It turns out that the SR 240SX guys have been doing it for years.