
To keep things simple I've consolidated all suspension relevant posts into the timeline below (most of which I've re-read and edited).

As of this writing the suspension consists of the following:
- Coilovers: AMR Engineering
- Bushings: Energy Suspension Polyurethane
- Brake Rotors: Powerslot Slotted
- Brake Pads: Hawk HPS
- Brake Lines: Goodridge (Braided Stainless Steel)
- Brakes (Other): OEM Rear-Disc Conversion
- Swaybar (Rear): SPS (17.5mm, 4-Way Adjustable)
- Swaybar (Front): OEM DOHC
- Swaybar Brackets: CFM (Heavy Duty, Stainless Steel)
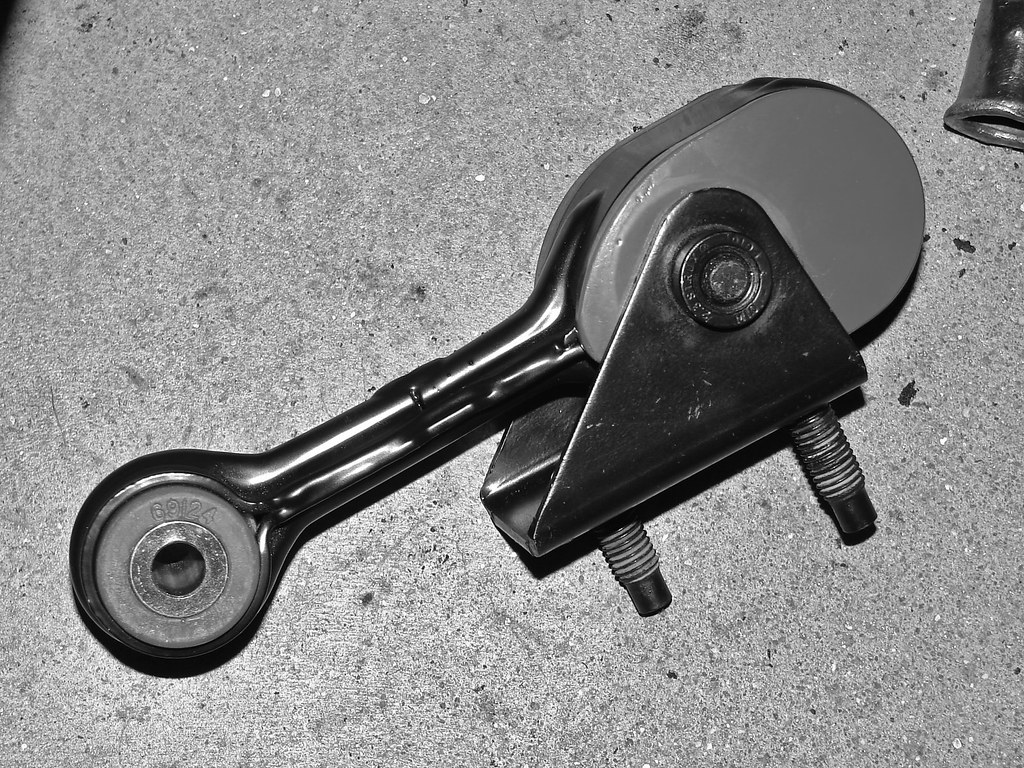
- Swaybar Links: Moog
- Spacers: H&R/QkSL2 Re-Stud Hub Spacers (Rear, 25mm)
- Suspension (Other): All New Hardware (OEM), Powdercoating (All Stock Components), CFM Lateral-Link Box-Ins (Stainless Steel)
Suspension Reintroduction, July 7th, 2007: "Since the suspension build has been going on since December of 2006 I'm going to simply link it, post the latest, and continue my build in this thread. The suspension itself wasn't really intended to get this out of hand but as things progressed I got a little carried away (something you guys will probably see alot out of me). This is my first serious step in this car and it has proven to be very painstaking. The powdercoated rear suspension parts were originally sorted in my room in January of 2005 and everything that has gone into this build was collected and saved up for in the following year. To date I am actually very close to actually getting this stuff under the car. With the original suspension dated at 203k the car more than needs and deserves it. The following is a list of the final set-up and the latest (but rather outdated) images. Progress has been long made on the front suspension while the rear suspension has gone untouched."
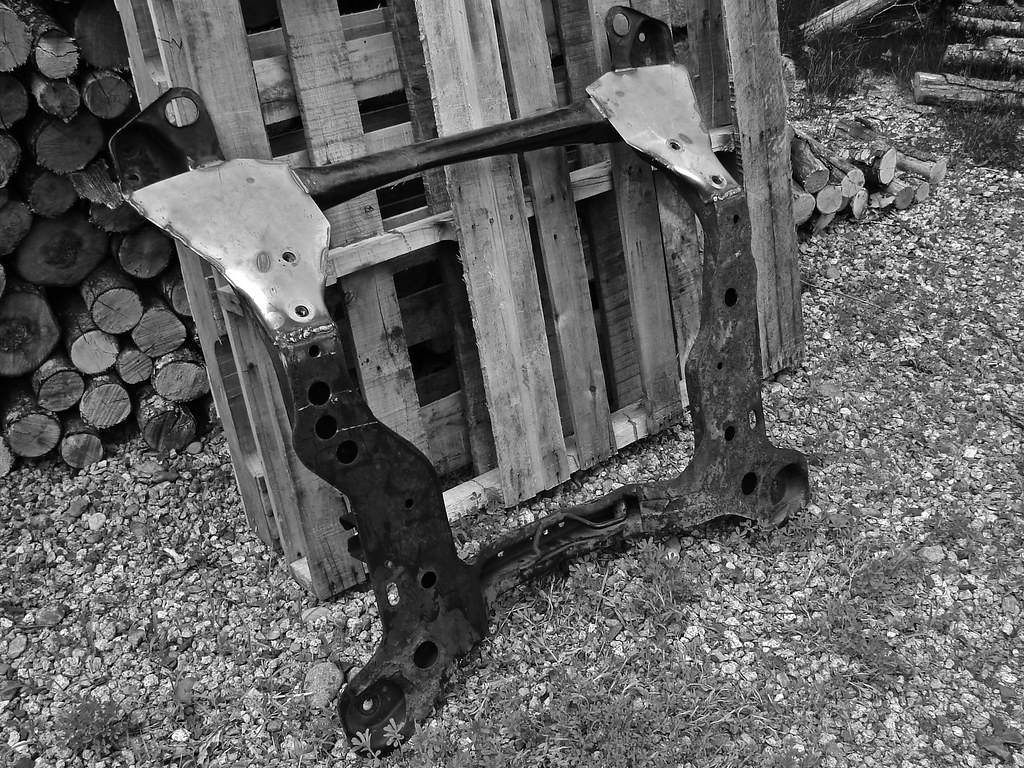
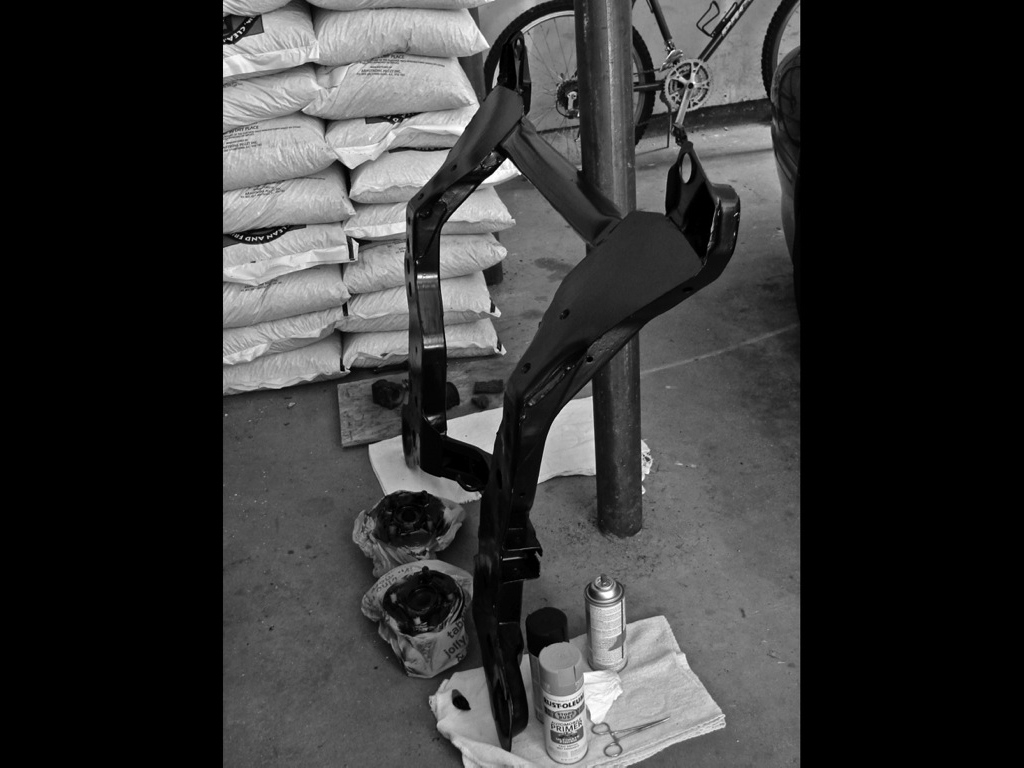
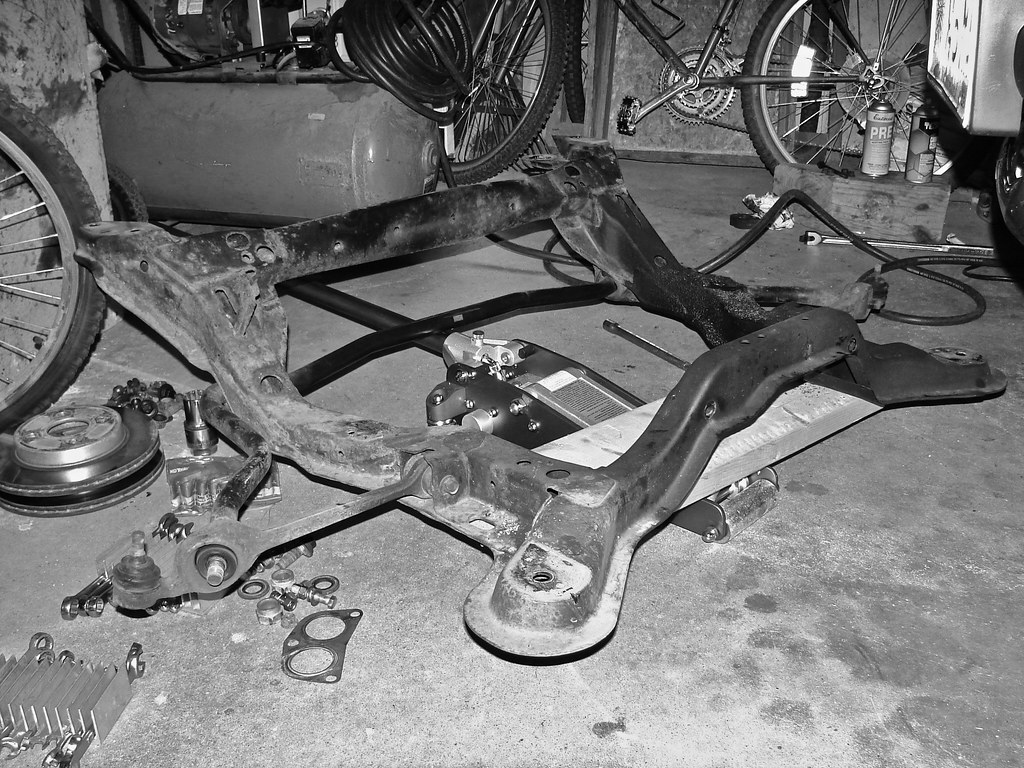
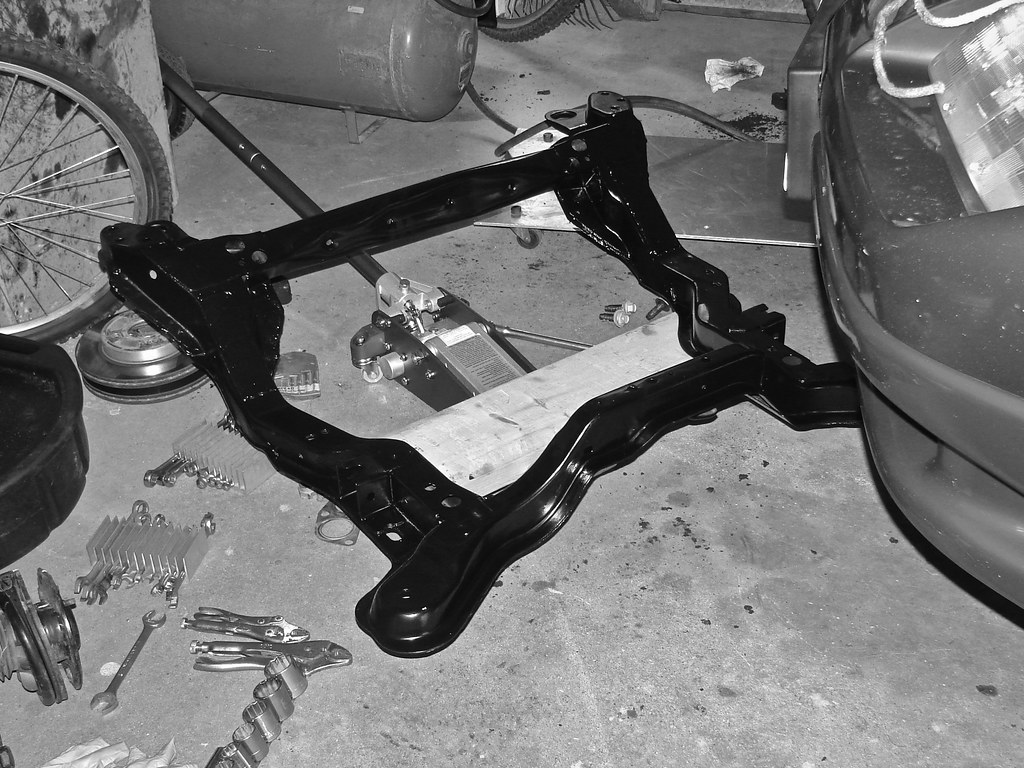
Engine Cradle, August 14th, 2007: "Alright, after a month I think I owe some updating. I've been meaning to do this for awhile but I've been too busy to take a long enough seat (or wash the car for that matter *gasp*). I've got plenty to throw up but I'll start with the cradle since its been done for at least two-three weeks now. Like I keep insisting this cradle is a temp, which is almost a shame because I've got way too much time invested in this thing. This particular cradle is actually from my Dads SW2 and was located (conveniently) in our deceased race car. It was in fair shape but kind of crusty in places so Dad whipped up a few stainless patch panels and went to town. After he migged everything up for me I put aside some time to grind. Then I spent a stupid long amount of time hand sanding whatever I couldn't reach with a wire wheel before I got around to cleaning and treating everything with some OxiSolve. I wrapped this portion of the project up with two coats of Rust Bullet (which I didn't take shots of unfortunately) and gave the cradle two color coats of Rustoleum Semi-Gloss Black. It came out alright; it'll do the job at least. I had some issues with the Rust Bullet, which was brushed on, so the cradle has pretty distinct brush strokes. Oh well though, its temporary right?"

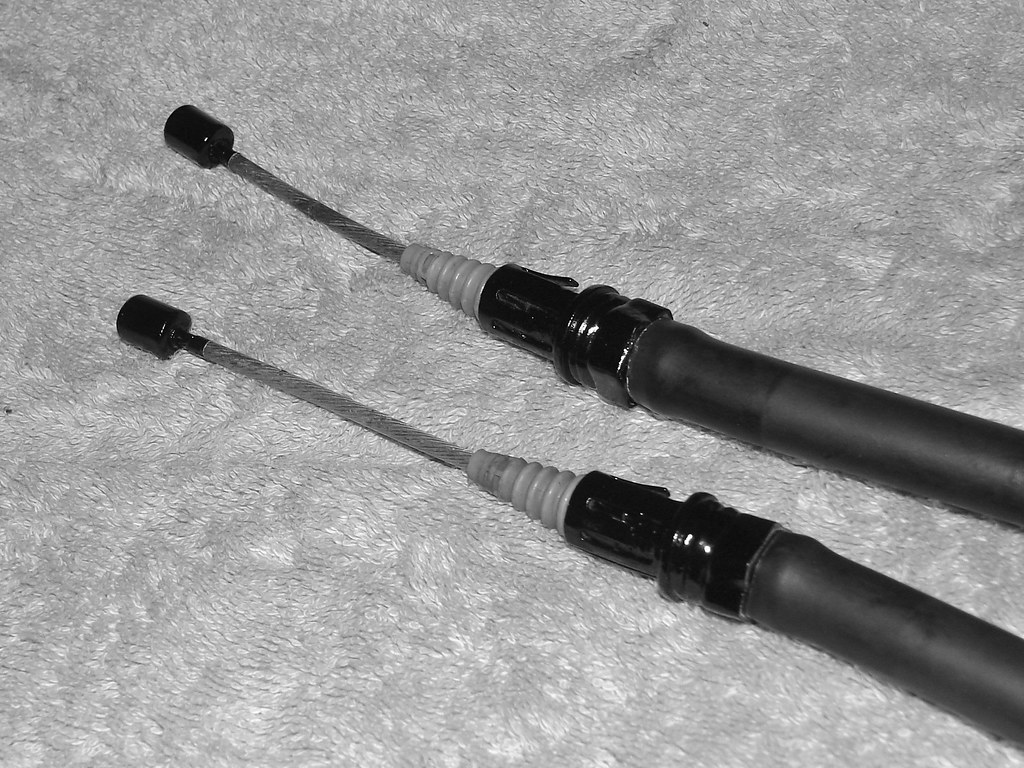
Pre-swap Update, August 29th, 2007: "A rather bulky update because I suck at getting around to these things. Anyway, as the title says, this is the moment I've been waiting for! Took Saturday off from work to dive into the car and put all of my hard work into place. As of right now I'm just finishing up some details, mainly my obnoxious need to refinish some of the tedious steel details of the rear-disc emergency brake cables.

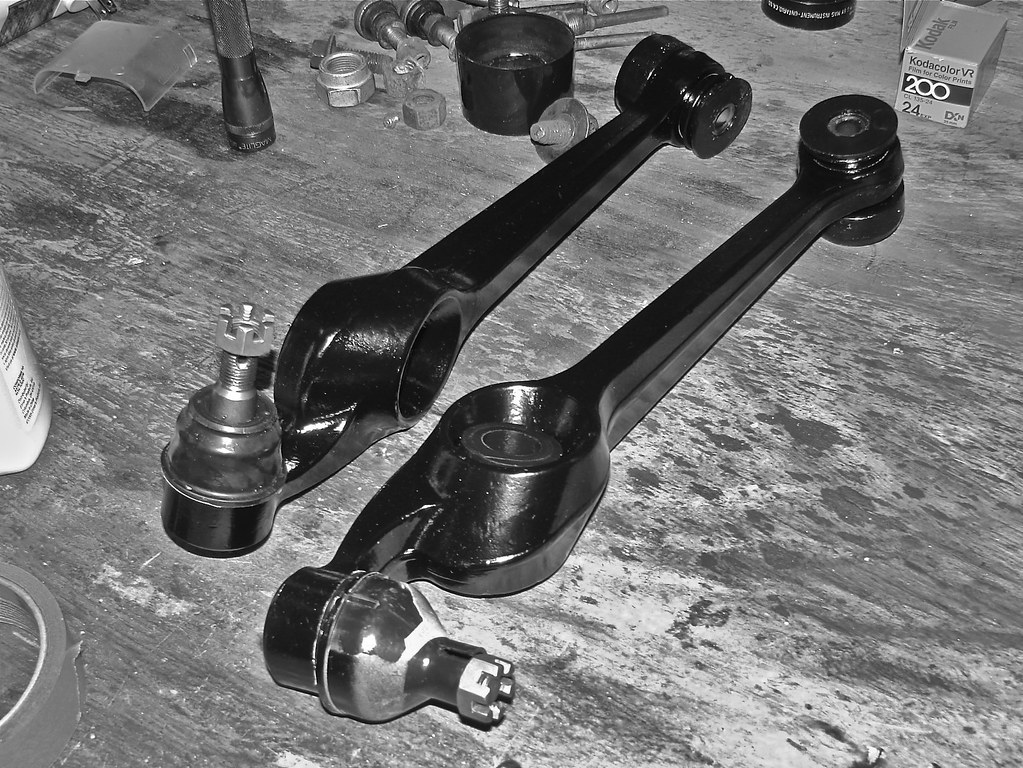
Other than that everything else has pretty much been finished, picked up, or bought. For your visual pleasure I've got the work-in-progress of the LCA's which were picked up brand new. Had the rubber bushings torched out of place when they refused to leave via press. Made quite the sticky mess and made my desire to repaint the things more feasable. Wrapped those up with the Energy Suspension bushings last week which were ultimately installed by Dad.
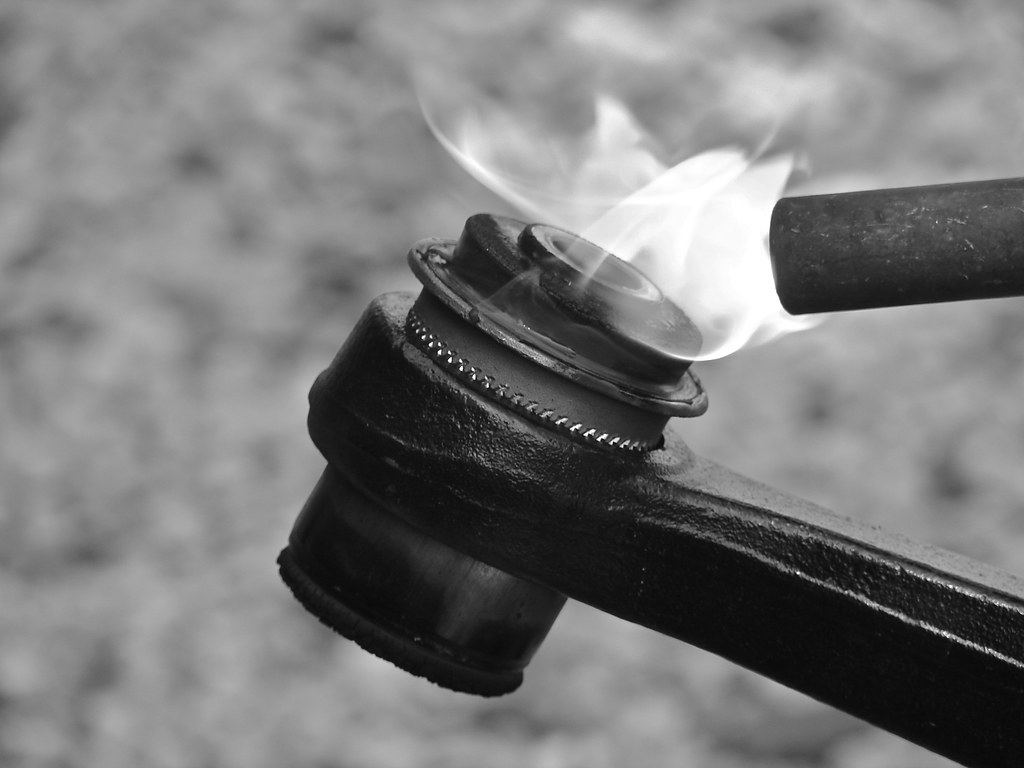
Other recent work has included the installation of the trailing arm bushings for the pivot points. Finally got around to picking up some new Car Quest (Moog) sway bar links which mark the final purchase of this build (for now I hope). Anyway, I decided to throw up some progress shots of the cables, and some shots of some "older stuff" that has been laying around as well as some pictures of the recently powdercoated front sway bar and brackets."
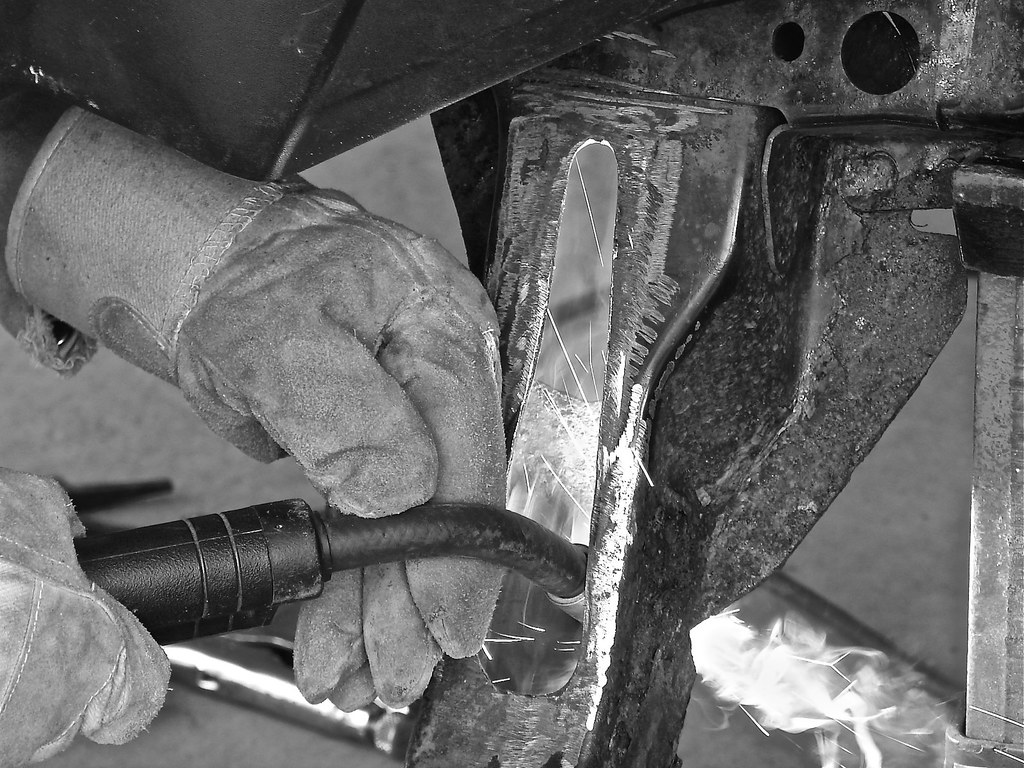
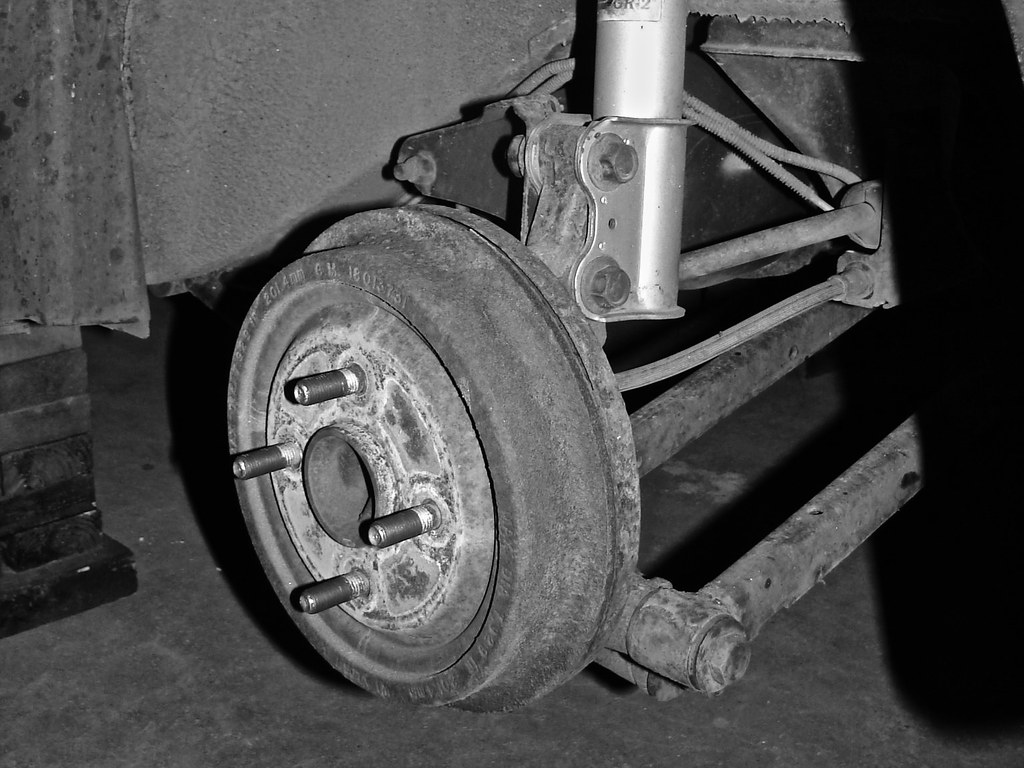
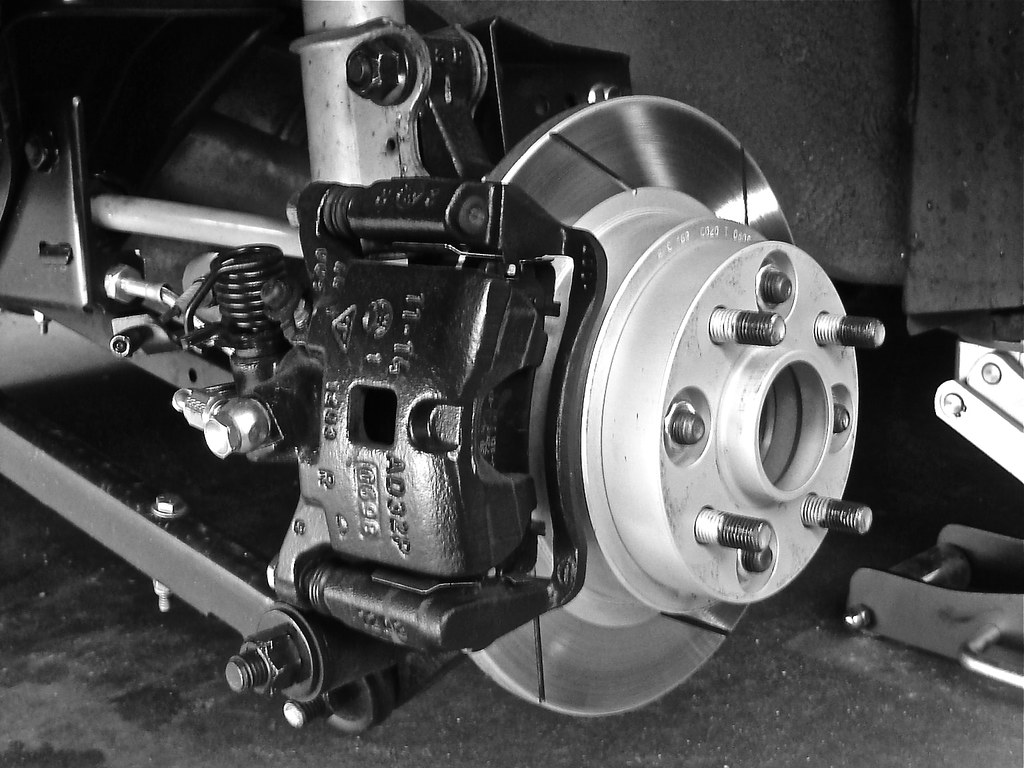
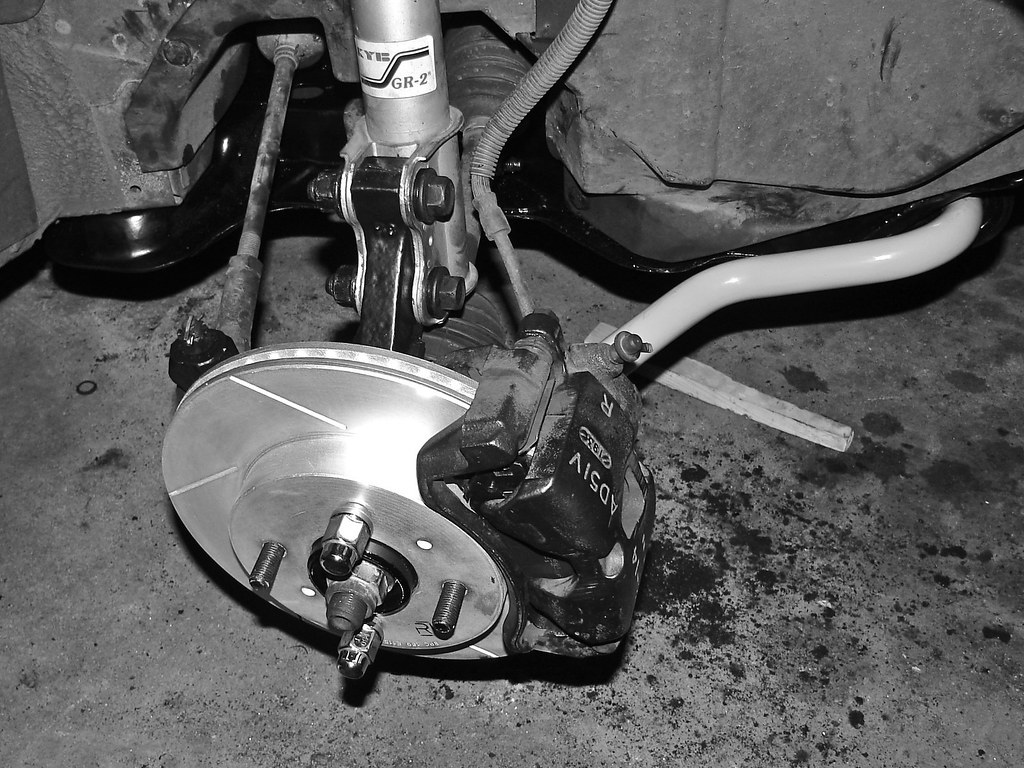
Rear Suspension Swap, September 2nd, 2007: "I've done all the bolt-ons. I've swapped an entire door shell. I've even had the exterior of the car apart multiple times. But I was definately not prepaired for this. The results? Right now the car has half a zero mileage suspension in the rear. The front still has the original 205,000 mess under there which sort of makes the entire car an unbalanced mess itself. What was supposed to take roughly 6-7 hours ending up taking me closer to 14-15 hours. The entire process was very discouraging. I ran into minor inconveniences throughout the removal of the original suspension that turned out to be major set backs for the novice (a.k.a. moi).
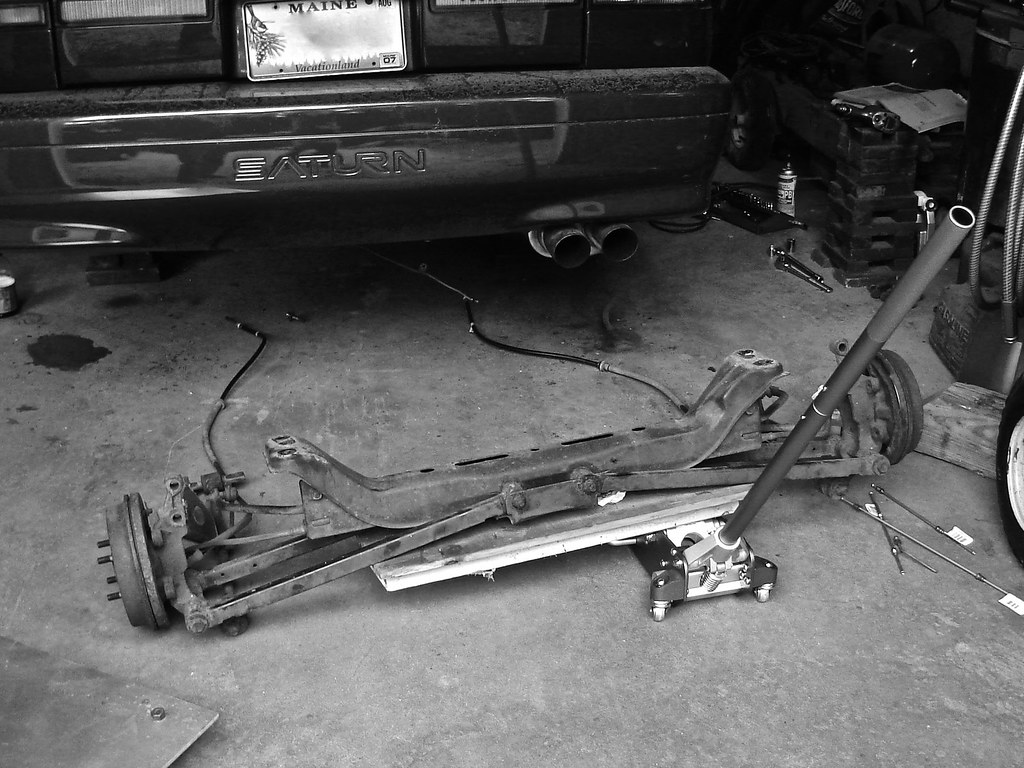
The gobs of lock-tite, some heavy torque specs, and the New England corrosion were the major issues. Major problem one; flare nuts on the brake lines. Even after a few days soaking in PB Blaster the bastards were still frozen in place and I ultimately stressed the brake lines; not enough to break em' but enough to make us want to replace them. Dad resorted to the local Autozone for some new fittings but was unable to find the sleeve-type fittings that would mate the original hard lines to some new ends. Next up were the damn crossmember to body bolts. I had a long ass fight with an air gun and a breaker bar to get those out.


The new ones even went in as hard which made putting everying back together just as discouraging as taking everything apart. We also discovered that the rear-disc e-brake cables are (oddly) too short for the application. A simple fix; I'll just be carrying a block of wood around with me for the next few days. The time frame: I dove into it at noon yesterday, gave up at 1:00 am, got up at 8:00 this morning to finish things off (with tons of help from Dad) and finally had the car back on the ground and ready to roll at about 11:30. Despite the major headache everything fills good. Its hella firm out back and all of the upgraded stuff makes it feel more confident in the curves but I feel that the crappy front end is overshadowing the results.
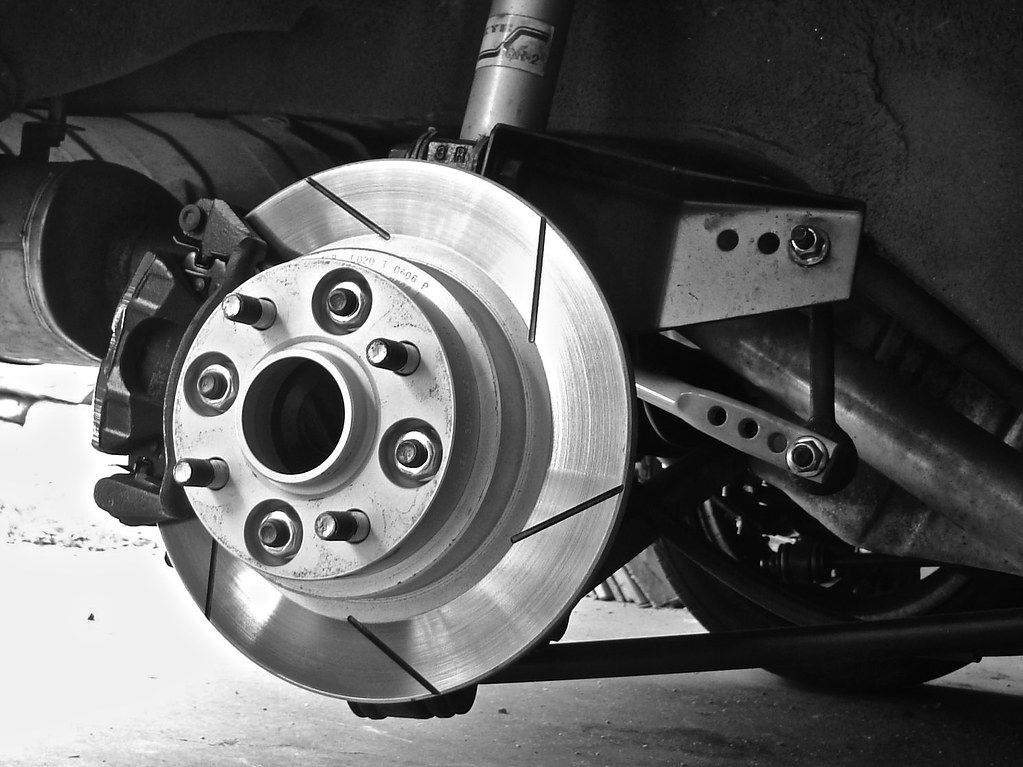
I'm still working over the fresh rear brakes, which I messed around with this evening on my way home from work. I'm pretty nervous about damaging the spend rotors and pads, even with the guidance of Powerslot's brake bed-in procedure. I did form a clunk somewhere in the passenger side rear; whenever I depress the brake lightly, but quickly. Paranoia is going to drive me crazy until I have a chance to jack the car up tomorrow evening. Hopefully its just my exhaust system being special per usual. I'll throw up pictures when I have a chance to sit down. Front swap; when I've recovered from recent swap woes and trauma. Well actually when I can take time off of work again. Ok, maybe both."
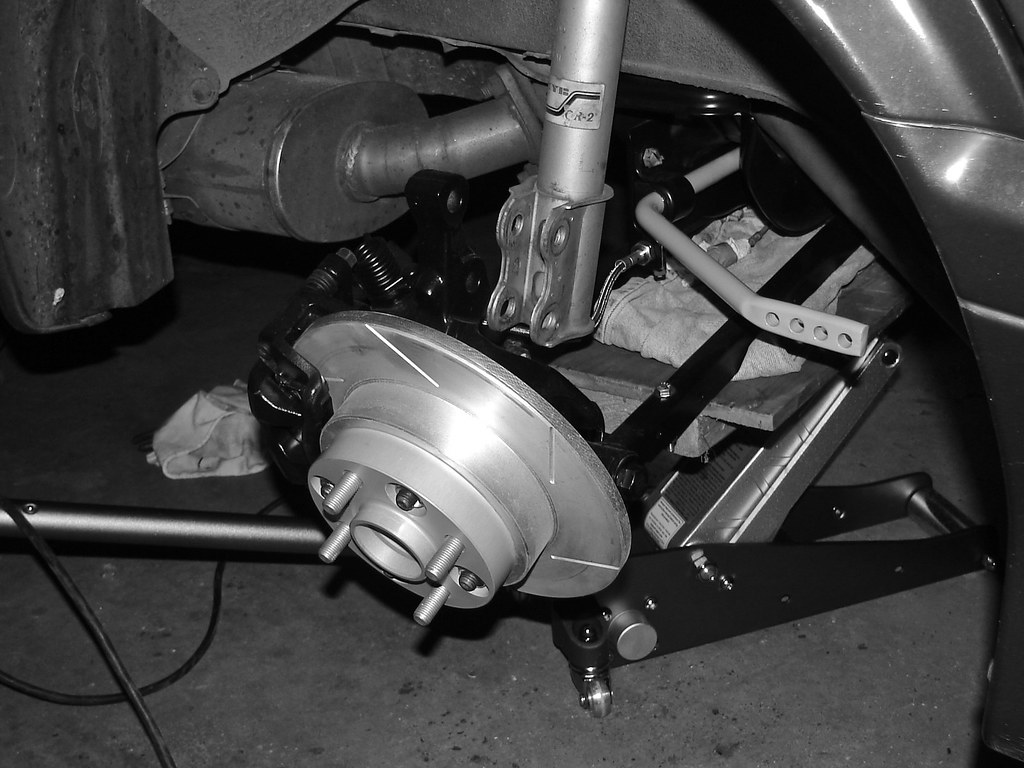
Front Suspension Swap, September 19th, 2007: "Well I got brave and decided to get the front done and over with guys. Talk about painful! What Dad accomplished in 4 hours took me close to 2 days (well 22 hours). I've got to tell everyone, after the traumas of the rear I was anxious (not the good kind) about doing the front. It actually wasn't as bad. In fact the front went tons smoother than the rear did (only getting hung up on removing the spindle/hub assemblies and installing the "new sway bar") I just took a really long ass time. Anyway, got started last Thursday afternoon and poked my way along late into the evening getting everything unhooked and ready to drop.
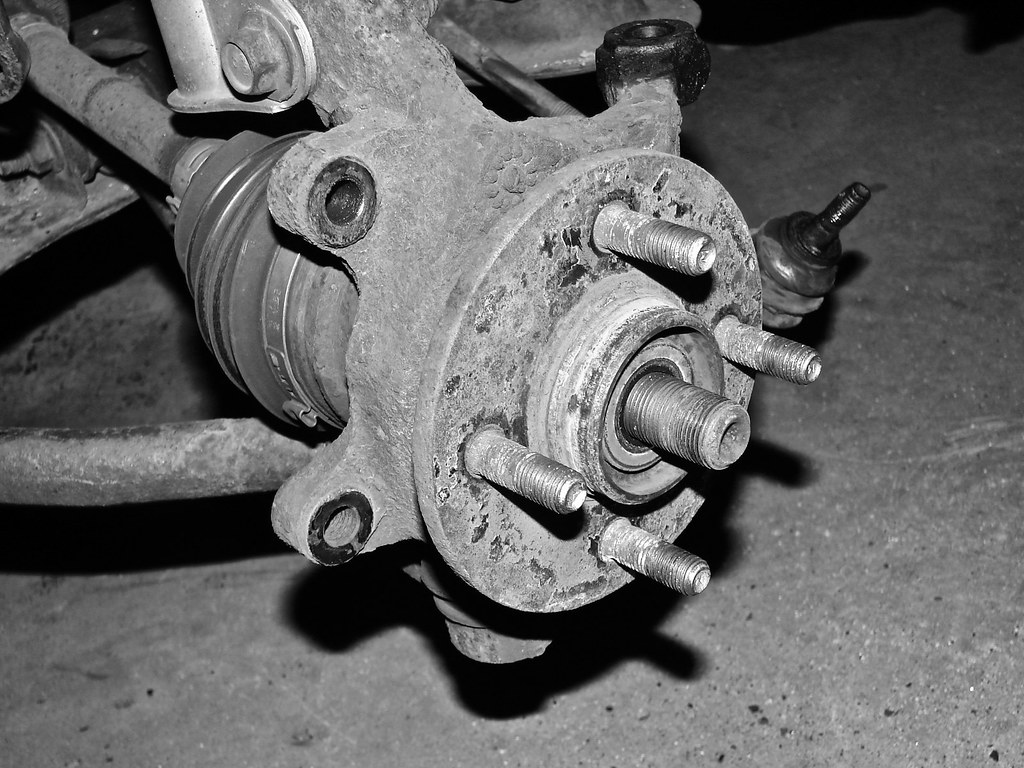
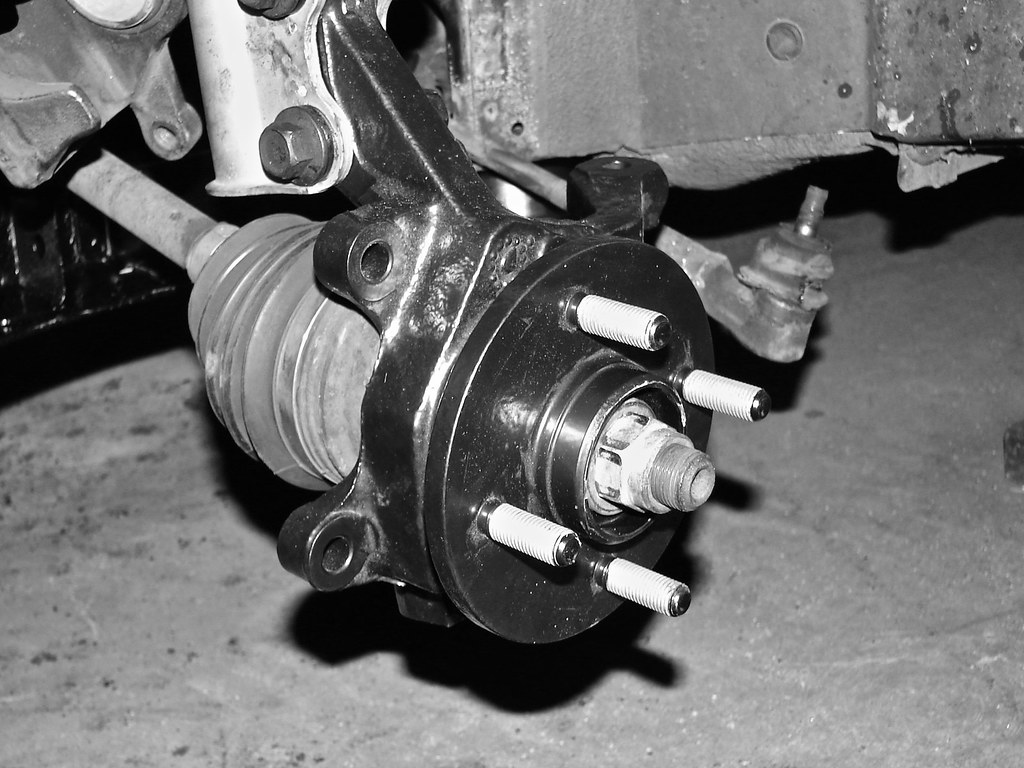
The old ball joints were completely shot (I could wiggle them around loosely) and you'll see that the passenger side motor mount had seen much better days. Friday morning I attacked the 4 heavy duty bolts suspending the cradle with an impact gun and dropped the old mess out. Things were looking up but I somehow ended up being under the car until about 2:00 am Saturday. Took her out as soon as I got her on the ground. How does she feel? Awesome! Now I can really feel the new suspension. Car feels absolutely solid with the upgraded bushings. A little harsh over bumps but totally worth the handling benifits (just something I need to get used to). The new motor mounts give the car much much better response and keeps the nose planted solid when I mash the throttle.
Haven't really pushed the car much; still shaking her down. Did some spirited driving on the coastal route in Kennebunk though. Car is very nimble and the old sloppy body roll is non-existant. Can't imagine how the coilovers are going to improve on this! Haven't pushed the new brakes either, I can tell they have bite though! There is some mild slop somewhere; hope its just from the out of round Ziex 512's and poor alignment. Only detail missing is my set of Goodridge brake lines in the front. Letting those brake fittings soak in really good shape before I take a flare wrench to them.

Might also repaint my front calipers when I take everything apart (brake fluid did a good number on them when I installed them over a year ago; need to use the right stuff this time!). Also had Dad do a bs-alignment on the front end to get me by until the coilovers come, then I can get the car an actual alignment. My old Falken Ziex 512's are on their way out so I'm not too upset that they are suffering utter devastation throughout all of these in-between phases. Anyway, got much better coverage of this than I did of the rear suspension. Don't let the pictures fool you though; they seem to make the process look alot easier than it actually was."
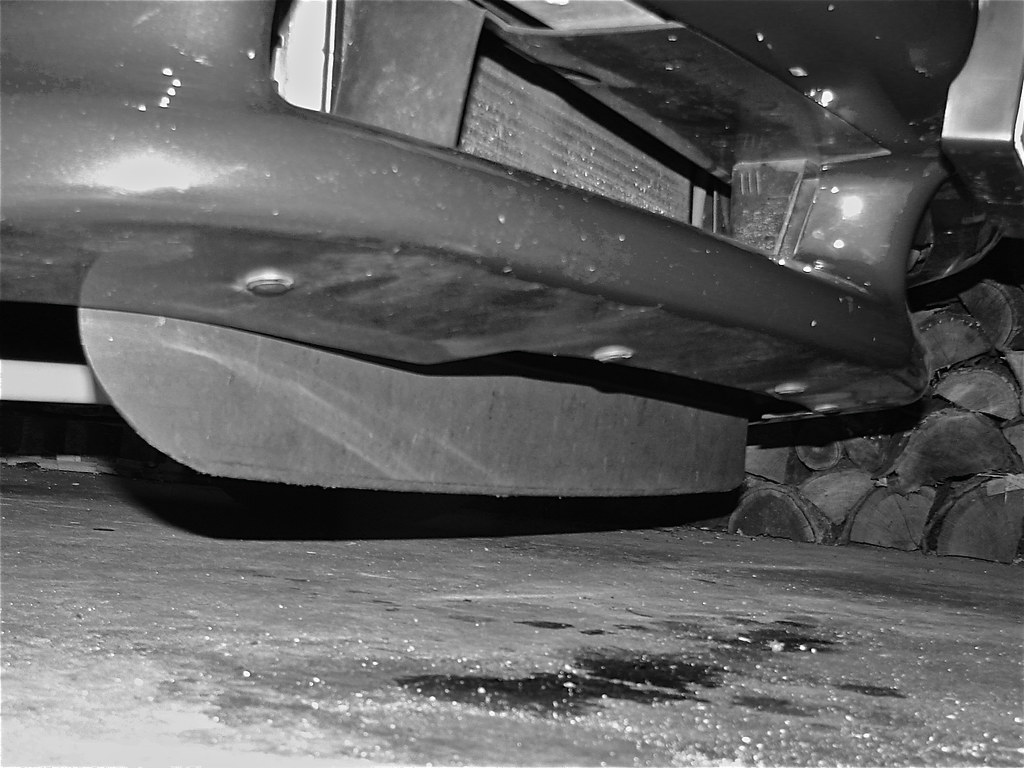
Chin Spoiler, October 7th, 2007: "I haven't had much to physically do on the car lately other than a few little things. This little project was the bigger of the little projects (read that sentence over and over again). After the front suspension swap it was pointed out that the mounting holes, located on the engine cradle, for the plastic under tray and chin spoiler were non-existant. But instead of drilling holes in the cradle and reattaching the unwanted plastic I decided to minimize things. All I really needed were the mounting points for the spoiler so I got dremel happy and cut off the foward leading edge of the tray (which made a wonderful mess of melted plastic) and tossed the rest (which should also prove convient in the future of a downpipe or intercooler plumbing). The cuts were very rough and I, of course, couldn't leave it like that so I made a good handful of passes on Dads (home made) disc sander until I was satisfied. A little handsanding to clean up the flashing (I guess you could call it that...) followed. Then it was as simple as mounting back on the car with the exception that the threaded clips and bolts were nowhere to be find so I killed a little time sourceing some from the parts box."

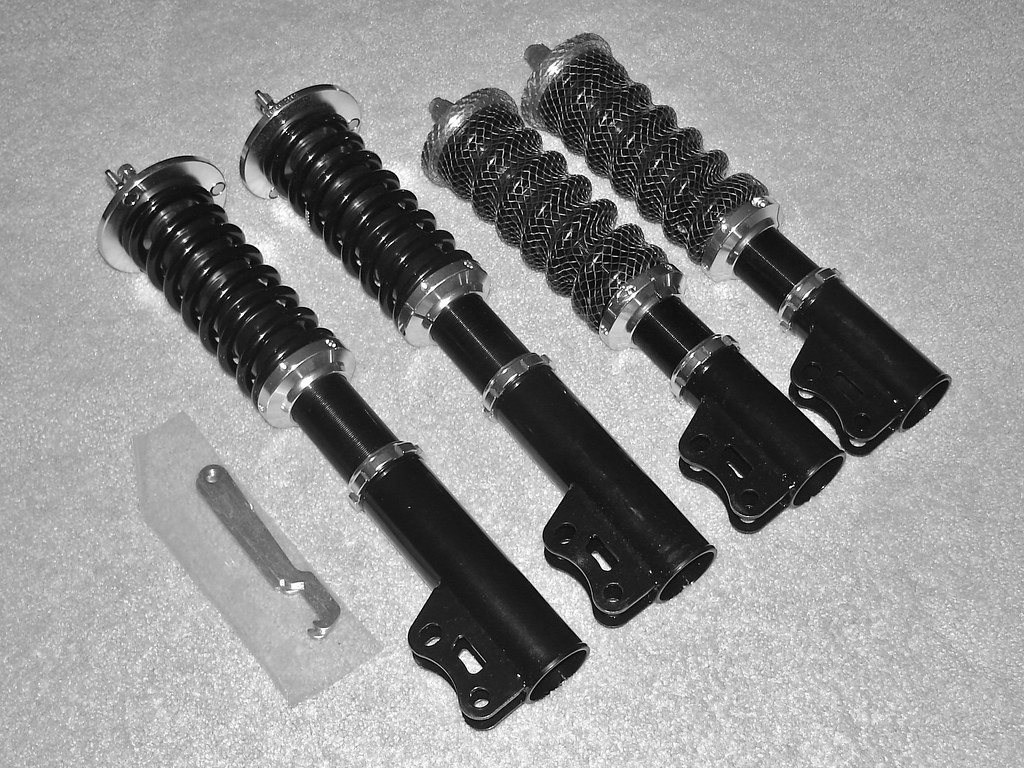
AMR Coilover Delivery, October 25th, 2007: "I was really surprised to find this big ass box sitting in my garage when I got home from work! I'm not complaining by any means though! I was getting pretty antsy last night with all of the "My AMRs Arrived" type threads floating around, just ask Dan. Anyway, it has been quite the haul. This process started on the TSN boards over a year ago. I remember all the hype and throwing down the deposite on em'! Since then TSN has dissolved and the AMR drama, almost 100 pages long, continued here when all of us lost TSN users found refuge on the Sphere. There has been alot of tension between the buyer and the seller with various grey areas of contact and information, delays, and thousands of dollars at stake but Andy came through in a fantastic way! These things are absolutely flawless in build quality! I fiddled around with them for awhile; all of the clearences are dead nuts tight, and the finish is top notch! All I can say is it was deffinately worth the wait. This product more than exceeds my standards in build quality. Next we'll see how they perform."
AMR Coilover Install, October 27th, 2007: "Quite some time ago I threw down for some brand new front strut mounts through Saturn (kick in the ass) in preperation for these bad boys. Being all OCD and stuff I went ahead and prepped, primed, and painted the strut plates (for cleanliness and corrosion ressistance more than anything). That was quite awhile ago too! Now installing the coilovers has to have been the easiest thing I've done this entire suspension swap! Putting together the front coilovers (with the stock mounts); not so much. Friday (the 25th) was graced by a (much needed) STC New England meet at Tyler's (sl2fast) place, in which Justin (d3ad1ysp0rk) managed to swap some fresh stuff on his daily driver and I managed to pound my head for four hours trying to figure these things out! Paranoid about my investment I assembled, disassembled, and reassmbled the coilovers at least a dozen times. All while sitting in the driveway with Dan's (I <3 My Saturn) girlfriend's laptop biting my nails waiting for responses in the suspension forums. A big thanks to Adam (adamkob32) and Billy's (SupraCharged007) quick help! Needless to say I got jack done which I partly blame on crust brownies, delecious burgers, and tire shredding burnouts (see below)! Finally in the evening I stopped using monkey instincts and stuck a hardened steel washer in there (provided by non other than Dad) and considered the fronts complete! Next day I got crackin' on swapping these bad boys in, with my lovely assistant, and was so anxious about getting them in there that I neglected to take "before" pictures as well as "after" shots of the rears installed. Not much to mention here; it was an easy swap although I took my time (I must admit that the passenger side front got a little knick that is likely to only bother me...). It was entertaining to stare at the wheel up in the wheel well before car was even on the ground! Also had to make some ghetto ramps (just two slabs of wood on top of one another) because the car is deffinately too low for the jack. I was a little strapped for time toward the end of the swap so I made some rough adjusments to the ride height; deffinately need to go back and fine tune everything. Haven't been able to enjoy the fruits of my recent addition either; it's been raining pretty much since I've installed them! Oh well, I'll update (with a complete set of pictures) when I get it all fine tuned!"
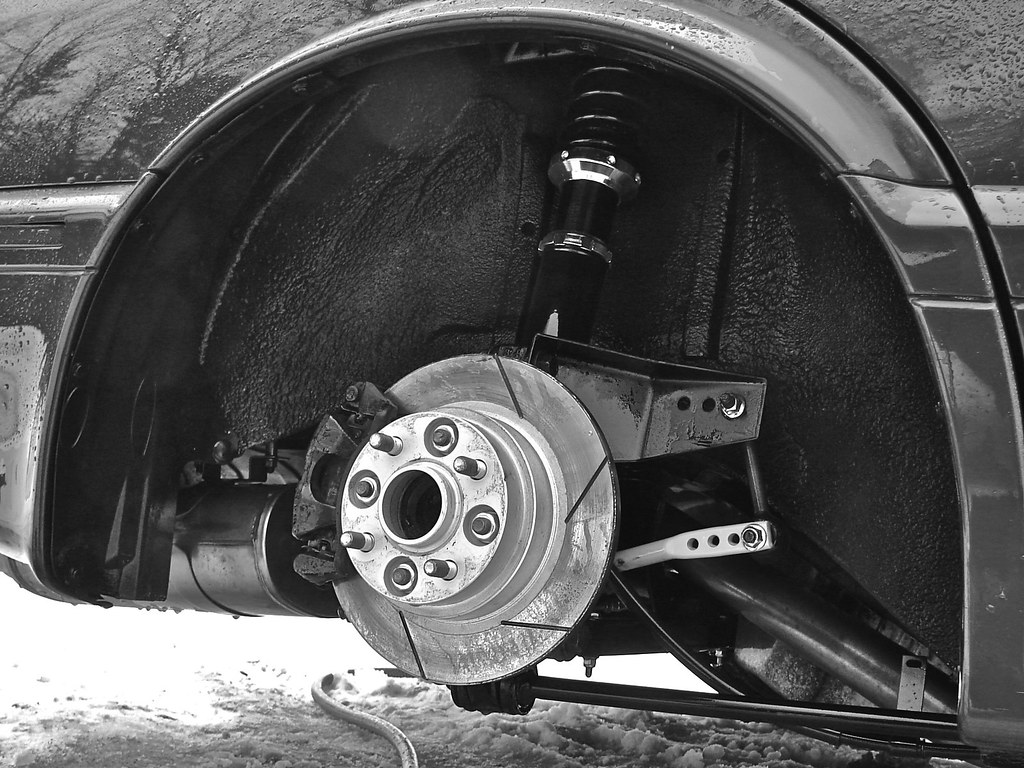

Dialing-in AMR Coilovers, February 4th, 2008: "Four months after the fact I think I finally have the car situated. No big deal because it has been sitting in its garage bay since a little after Thanksgiving. So, more or less, this is just an excuse for update. Getting these things dialed-in was strangely harder than simply setting each pair up identicle to eachother as the rear end proved baffleing enough to require a full one inch difference from one side over the other to get the car to sit level. I'm not exactly enthused with the outcome in adjustments so there is a very good chance that when I get motivated I will probably go back under there to further diagnose the issue. Overall I raised the car, just a tad in the front and a tad more in the rear. Its not really that noticeable over how dumped I initially had the car situated. Plus I wanted to give the overall stance a bit of a rake (I was troubled by the illusion that the rear sat lower than the nose). Other than that I have nothing really to say. I still need to swap the front goodridge lines, swap on my temp set of wheels, and get cracking on refinishing my current set of alloys. So basically in the past four months I've been lazy. The cold weather doesn't help, so hopefully in the comeing months my enthusiasm for the car will thaw out a little."
Budget Wheels & Tires, March 2nd, 2008: "Approaching this past fall I was a tad strapped for cash so I had to settle on a cheap/simple project to carry me through the winter. Here we are March and I really haven't done much of anything. But anyway, the wheels have been lacking on the "Detail Junky" since I sold my (questionable) set of Rota Subzero's. I've had better places on the car to throw the cash so wheels have always been on the back burner (although I eye something from time to time). Besides I want to play sleeper for awhile, and what better way than some stock rollers? Now when the car was purchased it was already optioned with Sawtooth's but they were a rather raunchy bunch. When my Dad landed some coupe wheels for the SW I had a much nicer set at my disposal. I wrapped those in a set of Falken Ziex 512's a good three years ago. "Nicer" isn't quite enough to satisfy me and any imperfection is too much for me anyway. We have had one spare set kicking around from the various Saturn's that have passed through, but they were in too hard a shape to tackle so I decided to temp em' on the car while I play with these. As you can see the car is lacking at the nose. The car is too low for the taller tires and I wasn't physced about resting plastic fenders on tread for an extended period of time. Also pictured are the 205/50 Falken Ziex 912's which have been sitting around since October... more to come soon!"
Budget Wheel Prep, March 4th, 2008: "It hit the upper 40's today so I got a little ambitous and decided to clean the wheels. I was going to go as far as stripping but some rain put the squash on that. Armed with a bottle of Simple Green and a scotch pad I got decent results. Kind of a cold, miserable, finger numbing task but oh well. The backside was almost unnecessary but I didn't want to be handling all of that brake dust so I gave em' a quick scuffing anyway. Again, these wheels were in fair shape but were deffinately showing their age; the clearcoat is peeling in a few spots, has some stains in some others, and has gotten overall hazy. BUT they are straight and smooth. No real visable pits, no curb rash... a near perfect surface under that clear coat. When the weather decides to cooperate again I'll know for sure; I've got some aircraft stripper, safety glasses, and heavy duty rubber gloves on stand by."
Budget Wheel Prep, April 10th, 2008: "Here is another month late update on a project that should've been done long ago. The weather has been warming up alot lately (hit the 60's today!) so I'm running out of excuses to not get this done. The wheels have actually been stripped for about a month, collecting dust next to the car they're supposed to be on. Following the last post up until now has been full of useless distractions. But anyway, I got back on the horse the other day and finally finished cleaning up the residue left over from the stripping process which was pretty quick. The container says "let sit 15-45 minutes". I barely waited five minutes before the old finish was falling off. Damn that shit is nasty (stuff like this freaks me out so I was more than thorough on the clean up)! I did have to "touch up" a few spots that were stubborn on letting go, but other than that everything worked like a charm. I do have a pretty clean slate to work with, no real heavy surface damage to worry about, just a little oxidation here and there. I did start in on one wheel. I'll be working my way up from 400 grit which seems to doing a good job of the texture of the original machine finish. It is taking some elbow grease and some serious time. A few hours a day and some sore fingers should get me there, results are going to be a ways off though haha. Only other thing; I'm undecided as to what I want to do with the spokes. They didn't really give to the stripper and I have no idea what the finish is like underneath there. Ideas?"
No comments:
Post a Comment