February 19, 2016

Electrical Parts Swapping

While reviewing my battery relocation diagram and checking it against various references two potential issues came to my attention. The first was that I was going to need a different remote starter solenoid relay.
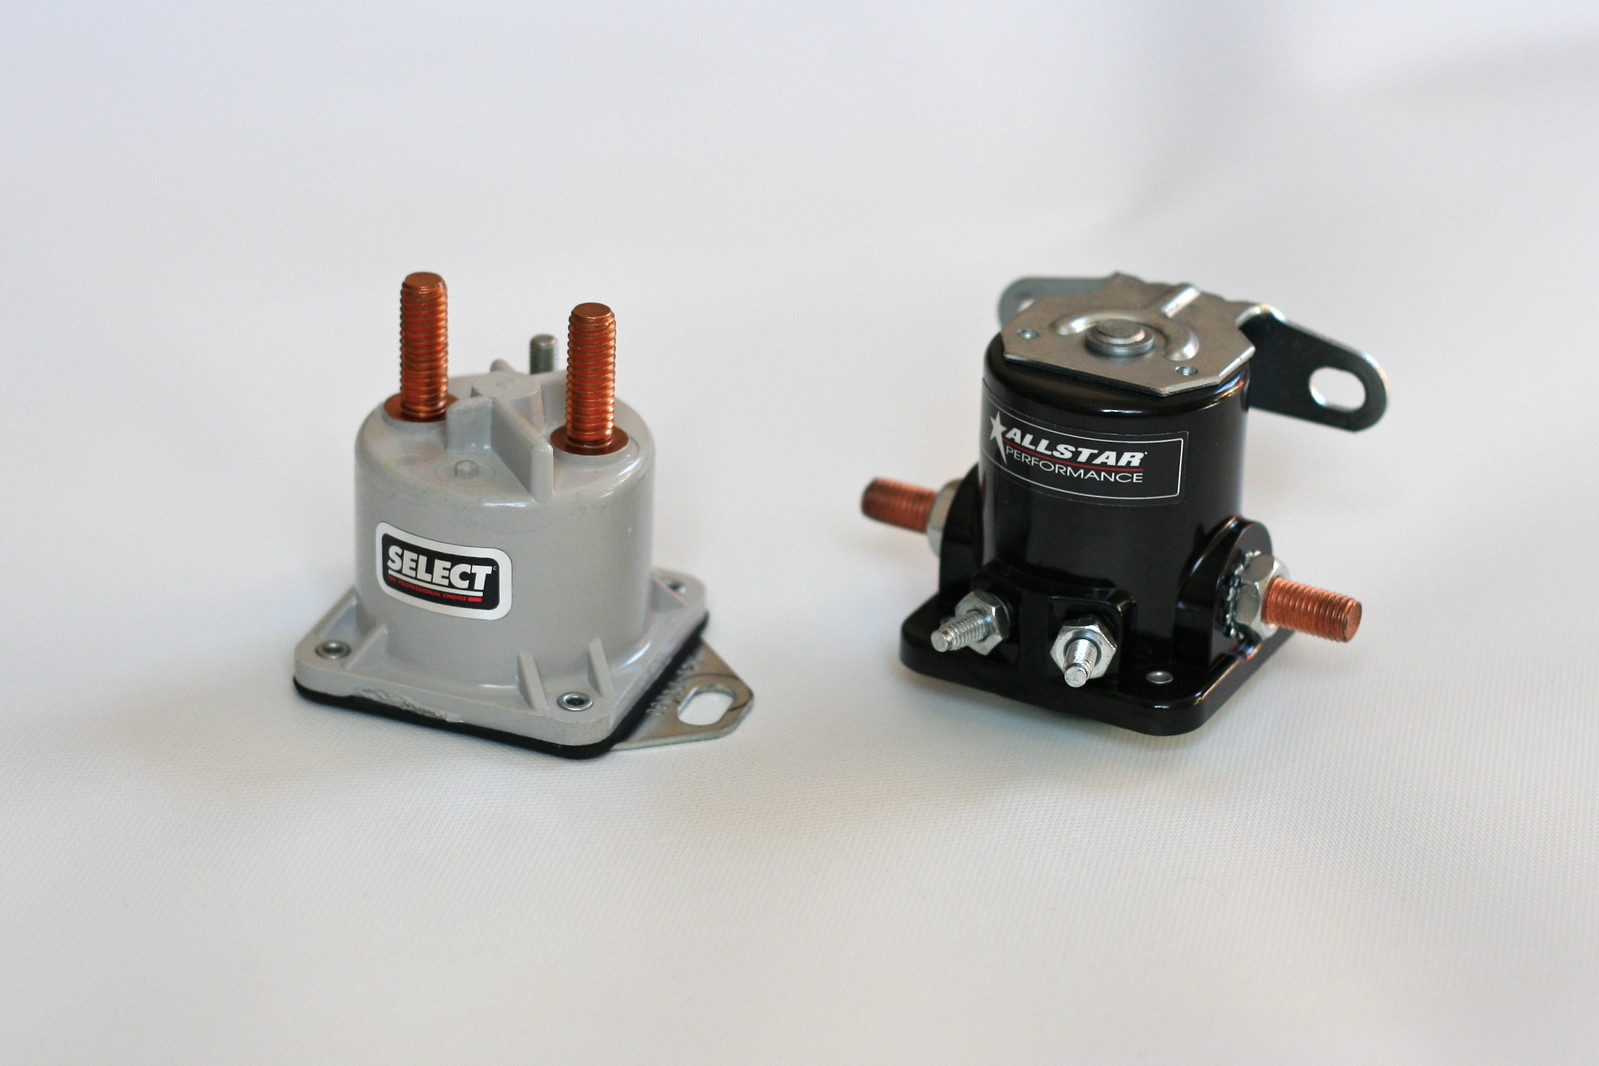

Shown above right is the outgoing Allstar Performance solenoid (part #ALL76203) with its replacement, a Borg Warner "Select" solenoid (part #S5048), on the leftBoth are examples of a remote starter solenoid relay, commonly referred to as "Ford-style" due to the automakers use of fender mounted units. For many years the small-block/big-block Chevy crowd have implemented these as a solution for "hot start" issues, a condition where the starter is slow to crank due to heat-soak-induced electrical resistance. Of course on a Saturn S-Series LLO this is a non-issue (more on the remote solenoid "hot start" remedy can be found at the Crankshaft Coalition Wiki). When laying out my battery relocation I chose to include a remote solenoid as safety measure. By function a remote starter solenoid relay is only energized when the starter switch is engaged, bridging the connection between the battery and starter. What this ultimately means is that the cable run from the solenoid to the starter will only be live while cranking.

February 13, 2016

Oil Catch Can, Ready To Install

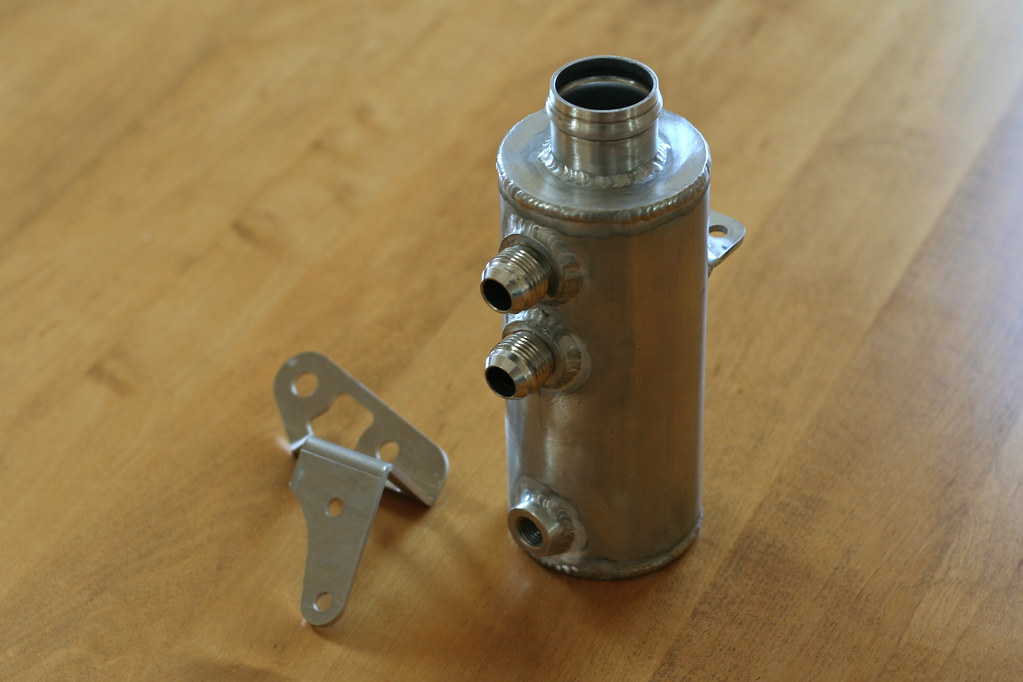
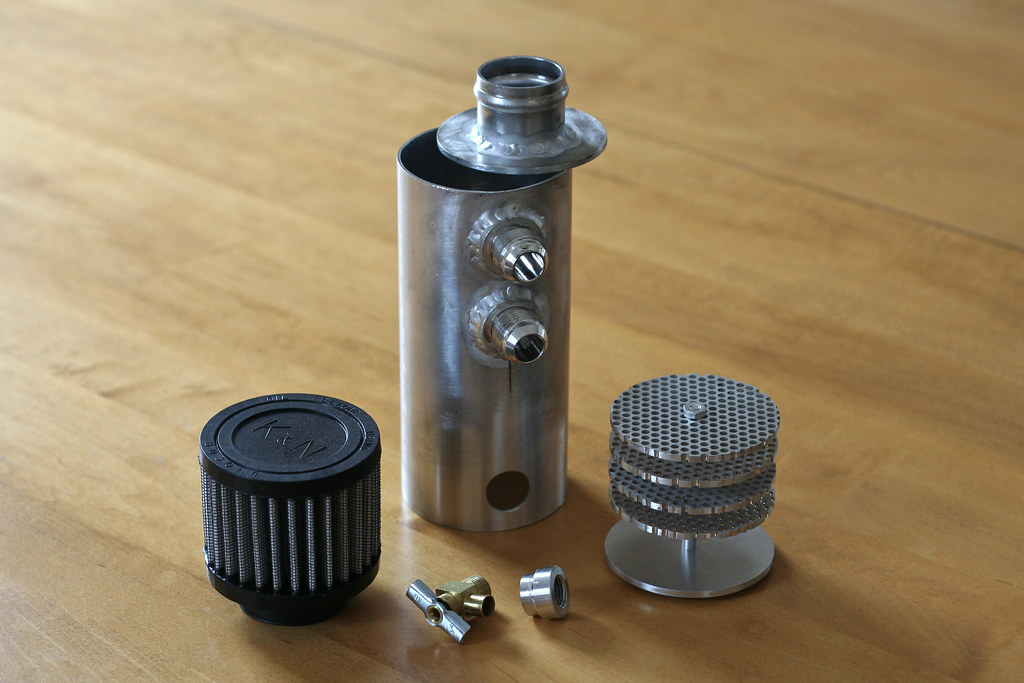
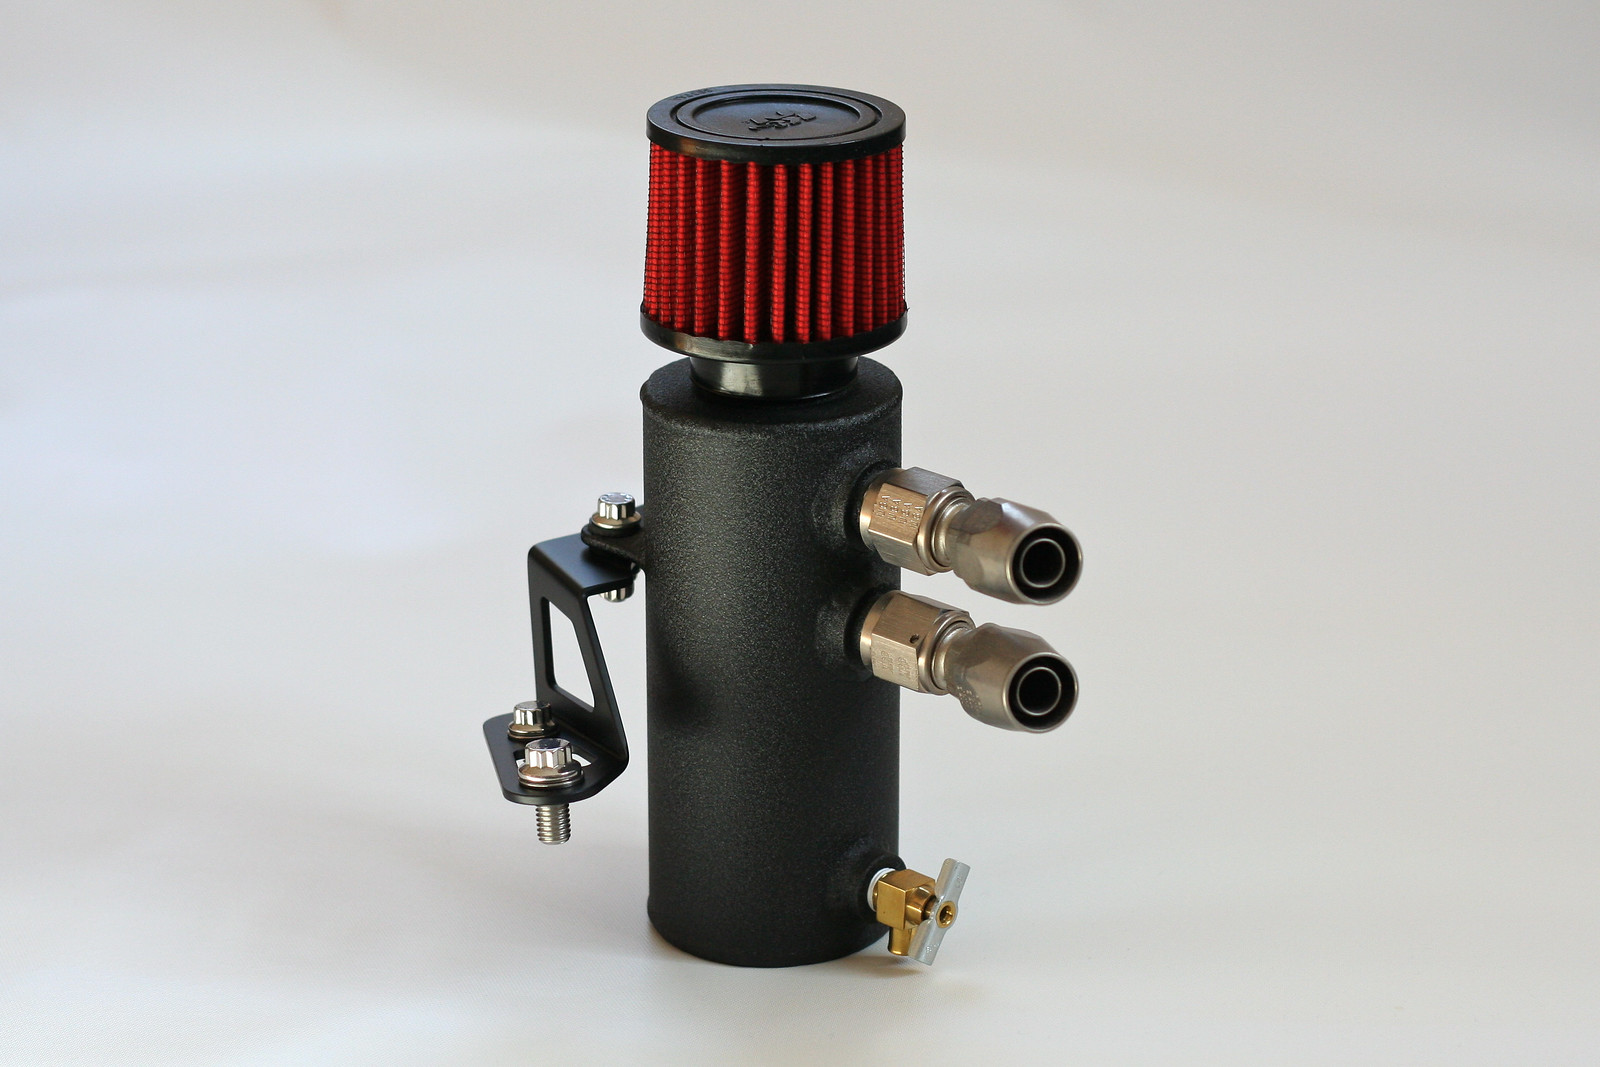
I brushed the dust off of this finished component for a photo-op. At long last, presenting the catch can in all of its powder coated glory.


I won't bore the audience by throwing even more text at this subject (for anyone just joining us, more information on the catch can is viewable in the "Preview" and "Welded Up" posts). Keen observers may notice that the filter has color shifted from white to red. As evidence of time lost during the project's hiatus, K&N started turning out their smaller line of filters with a synthetic media similar in color to AEM's "Dryflow" air filters. I would be lying if I claimed to have made the switch for any reason other than my intake and catch can matching.

January 21, 2014

A Touch Of Refinement

I decided to (temporarily) add a bit of creature comfort back into the gutted interior.


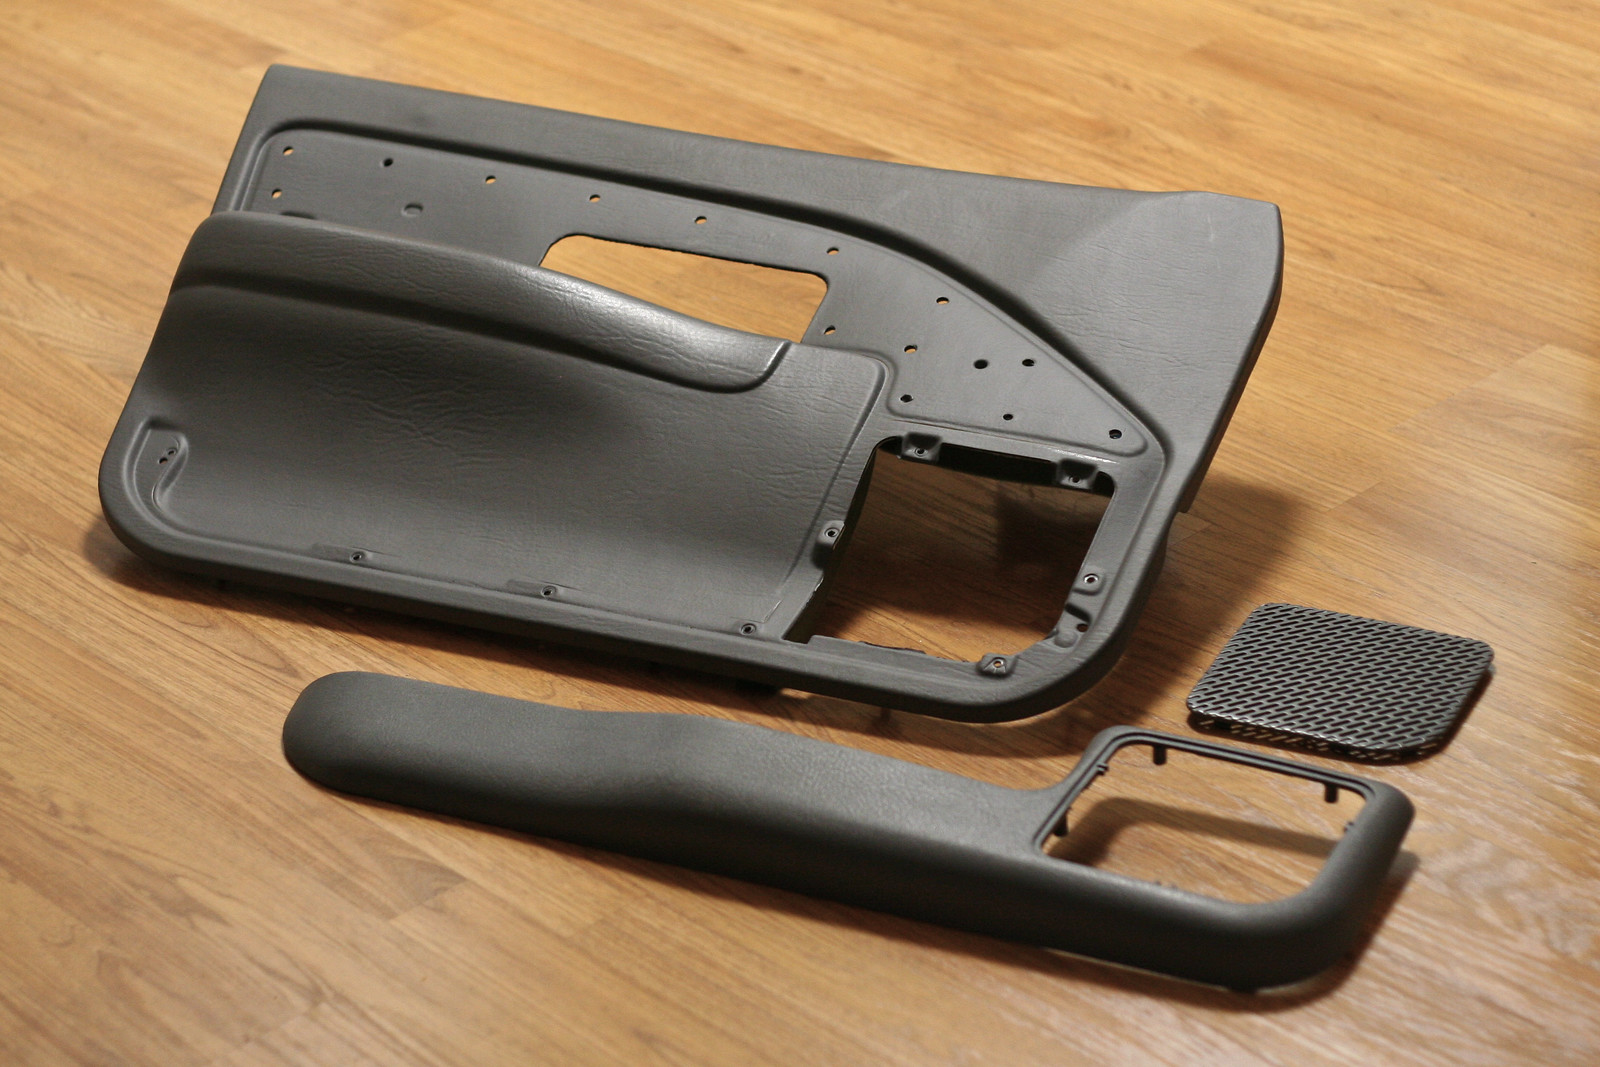
Years ago I located a really clean '94 SL2 in a salvage yard while scrounging up some parts for a prior Daily Junky. The car was a well optioned plum metallic example with a gray interior. If I remember correctly, its life on the road had been cut relatively short by a grenaded transaxle which (overlooking the mechanical failure) left everything in shockingly good shape, especially for a New England car. I took advantage of the opportunity to pull a few extra things for my own '94, including the inner front door panels. After sitting on them for reasons I cannot remember, it was time to dig them out and drop them in place. Several years of being shuffled between less-than-ideal hiding places had left them in need of a major cleaning. Each panel was fully disassembled to ensure that no spot was left untouched. Pictured above are the panels after detailing and prior to reassembly.

May 28, 2013

Electrical Component Preview

One of the last projects standing in the way of turning the key (as well as seeing if all of my wiring was done correctly).


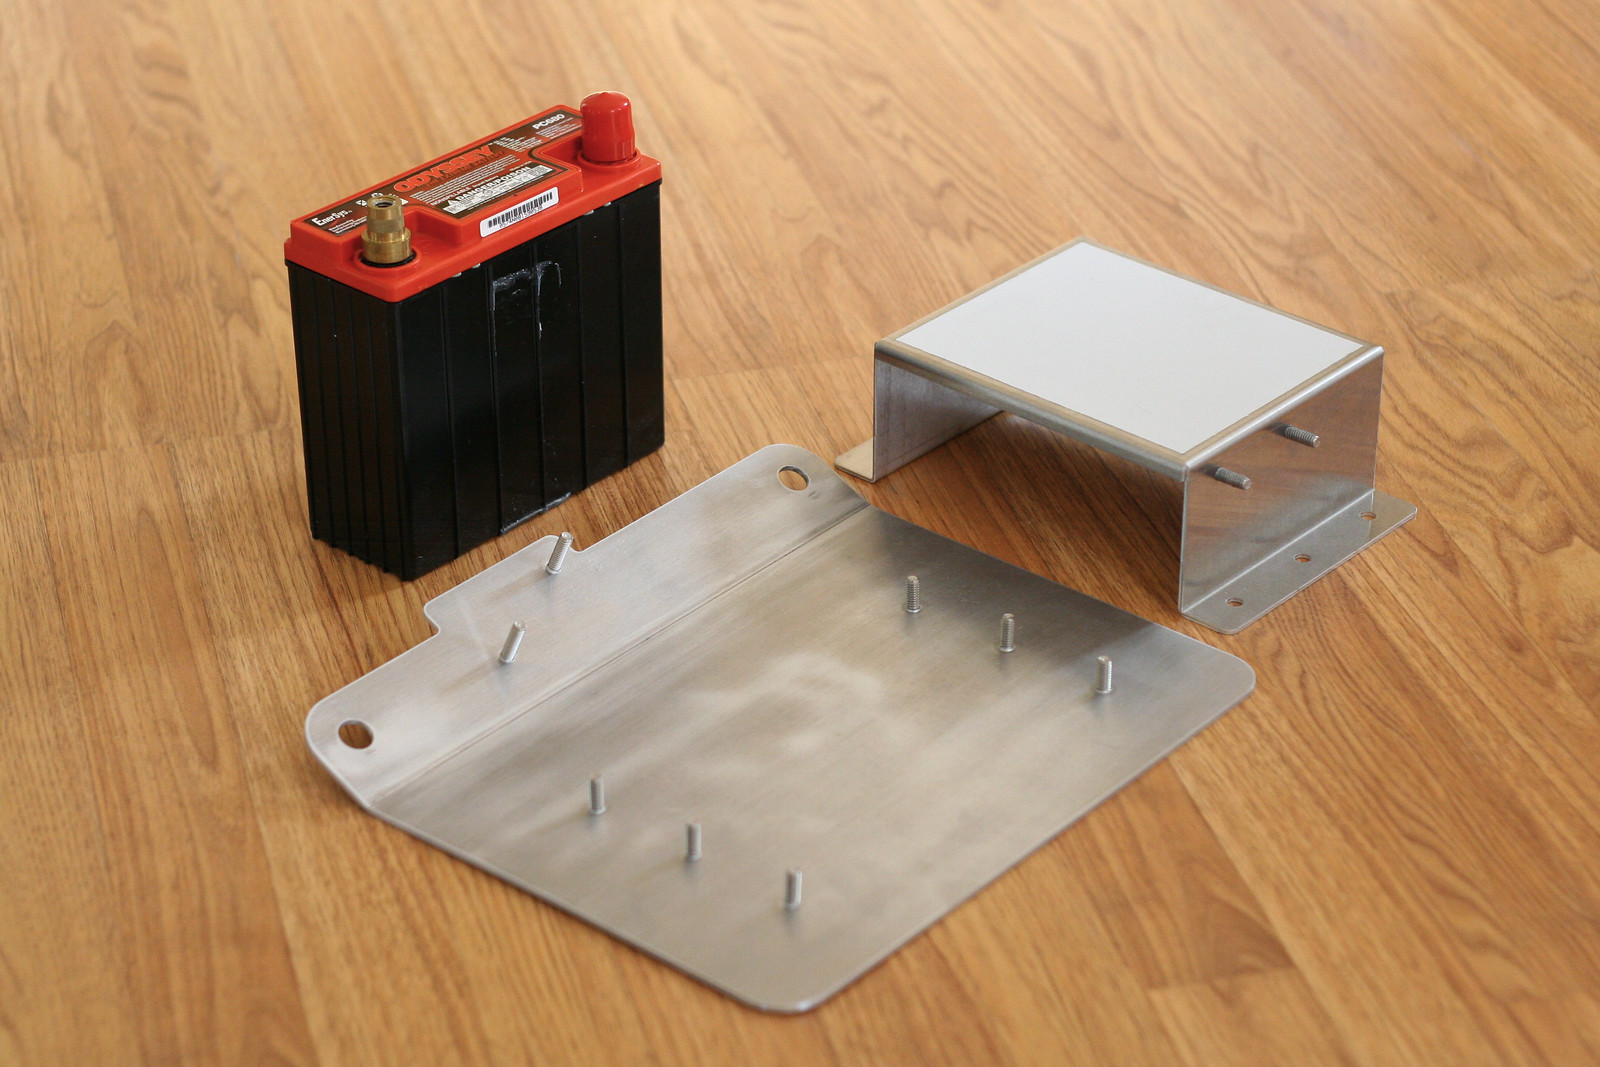
Like my other wiring projects, this one has served as an in-depth lesson in automotive electrical systems. And like everything else with this build, a project as simple as relocating a battery quickly snowballed. It seems to be common practice for batteries to migrate from the stock location (the engine bay in a Saturn S-Series) to the trunk. However, a known water leak made me weary of placing the core of the electrical system back there. With the rear half of the car empty I had plenty of room for an alternate setup. Power will come from an Odyssey PC680 dry cell battery, chosen for its smaller dimensions and positive track record with other Saturn builders. Accompanying the Odyssey are some additional precautionary components (pictured below from left to right):

May 10, 2013

Another Length Of Exhaust

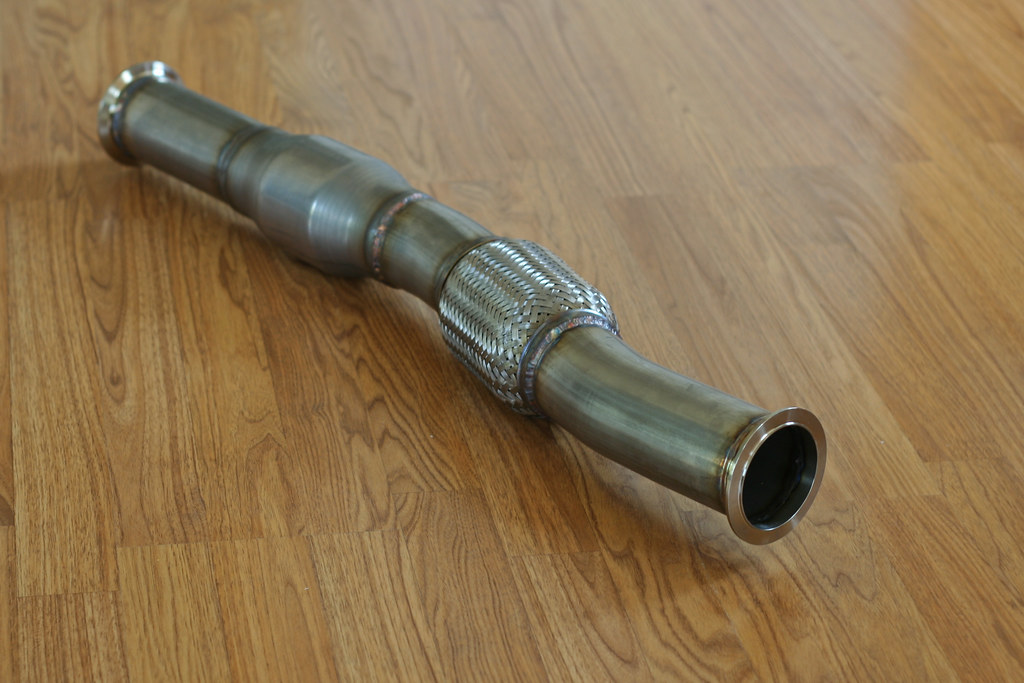
Already done is the next 3' (a little under actually, measuring at 33") of the exhaust system.


I'm going to call this piece the midpipe, the portion of exhaust that includes a flex section and the catalytic convertor. The flex section is a Vibrant item, 6" in overall length with a 3" in diameter and an interlocking liner while the catalytic convertor is a metal core unit, also from Vibrant, with a matching diameter and 10" overall length. To help tuck the exhaust system up under the car, I utilized two 15 degree bends. Everything is 304 stainless steel, of course! The final length of the assembly is entirely random. To keep the catalytic convertor a little closer to the front of the car, I shortened the leg of the bend right before it. The length after the catalytic convertor comes from the longest piece (6.5") of extra tubing I happened to have kicking around. It was an early decision to make this area of the exhaust system its own sub assembly, not only for a less cumbersome solo installation, but to make transport to the welder a little easier for the remaining (and now shorter) exhaust system. The last remaining detail is a hangar to utilize the stock hangar arrangement. I won't be designing that until the rest of the exhaust is ready and I can do all of the hangars in a batch.

May 05, 2013

Oil Catch Can, Welded Up

It took a few trips, but the catch can is all fried up!


I actually fell a few steps back after discovering that my spacing for the internal baffling put the bottom most disc right in the way of the oil drain fitting. This wouldn't had been a big deal, except for making the discovery after having the aluminum nuts tack welded into place. Needless to say, I was at least able to save the perforated discs. Another order with McMaster Carr later, and I had a new and improved version of the baffling - this time I opted to loctite the top nut into place, and eliminate the bottom nut by having the stem of the assembly welded to the base of the catch can. 

May 01, 2013

Downpipe Revisited

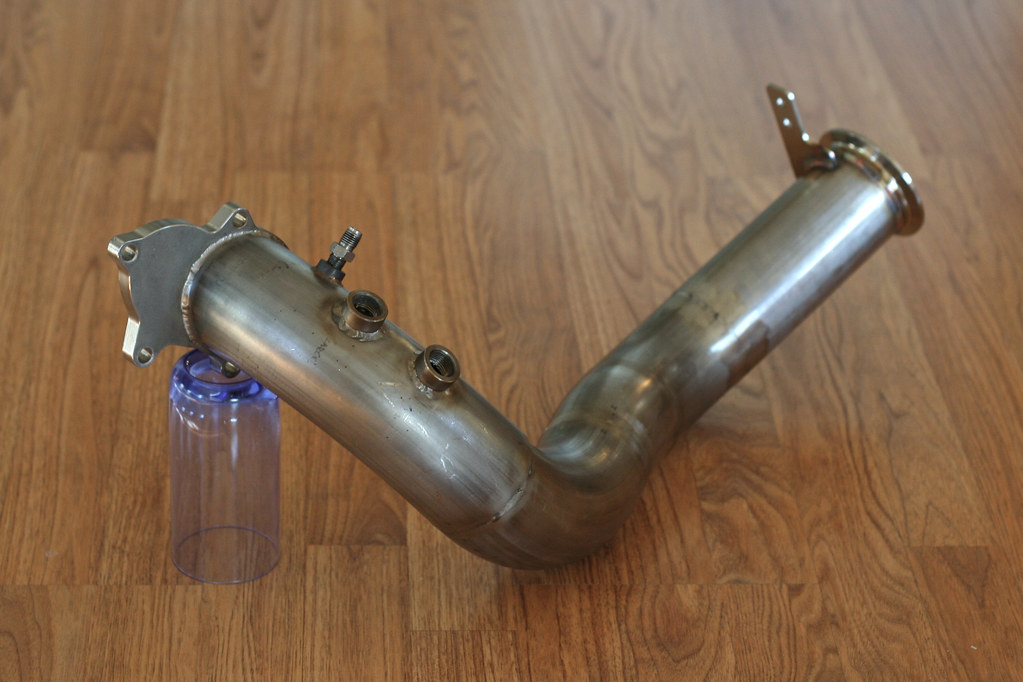
Sometime in February I discovered that the downpipe wasn't quite done yet.


Embarrassingly, I had a bit of an oversight with my placement of the oultet v-band flange when I originally fabricated the thing. As I found it, where it ended up next to the oil pan, was too tight to get the v-band clamp on. How I didn't see this the first time I'm not sure, but after a face-palm, some choice words, and removing the wastegate/dump tube assembly the downpipe was back out again. To remedy the problem involved extending the length by 6" to push the flange out into a more open area. Fortunately I had plenty of spare material kicking around, although it meant sacrificing the v-band flange that was on there. The extra length did create another situation however. In the same fashion as a stock Saturn downpipe, I had wanted to add a bracket to secure the exhaust against the two rearward most mounting points of the transaxle-motor brace. Originally I was going to save this additional bracket for the next length of exhaust, but since the downpipe was now passing under these points I would be adding it to the extension.

April 08, 2013

Laser Cut Goods

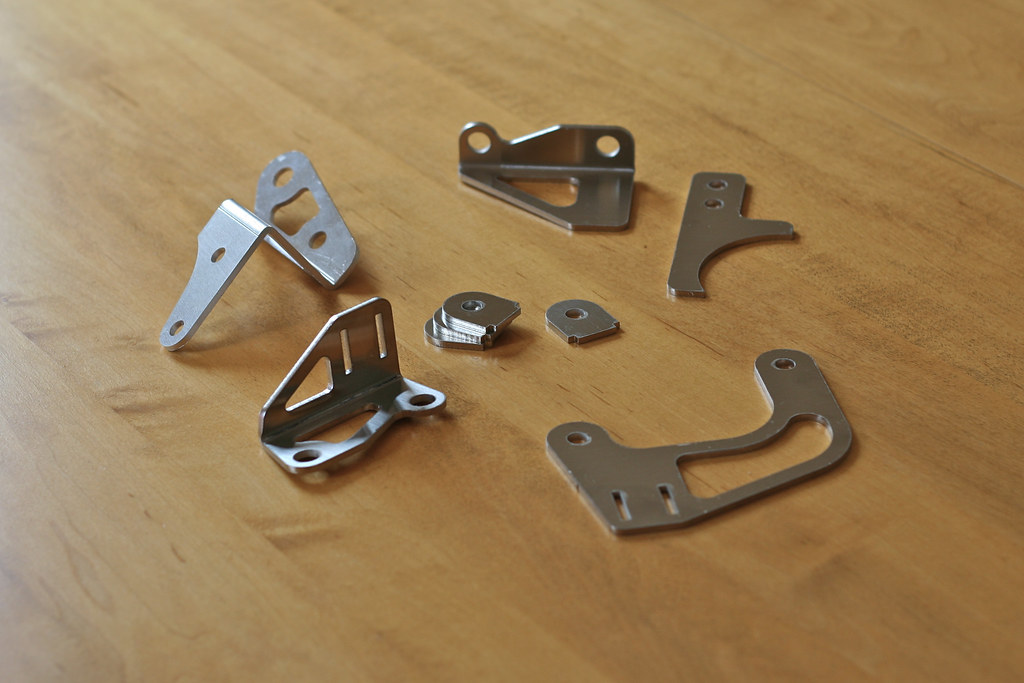
I thought I'd throw up a quick picture of some laser cut pieces that just got delivered.


Everything was cut out of 11-gauge stainless steel with the exception of the bracket on the upper left, which is 1/8" aluminum. Generally I'll fabricate brackets (such as my oil filter relocation bracket) on my own, but my resources tend to confine me to aluminum (I also don't have a proper way to make bends). Since I was going to be using much harder stainless steel, it made more sense to outsource the work for accuracy and a more finished product. It was also a chance to utilize some of my education - the items pictured started out as cardboard templates that I redrew and refined in AutoCAD. I would like to thank Sixthsphere member coppertop_01 (Jeremy) for providing me with his services. I simply provided him with the drawing and he took care of the rest! As for what each piece is, I'm going to wait to tell as they reappear in future posts.

January 18, 2013

Oil Catch Can Preview

Along with the wastegate dump tube, this is another project that sat on the workbench taped together and waiting for welding, for a good portion of the year.


The first thing you'll probably ask, and this is the first thing my welder questioned - why not just buy one? The answer is that I simply could not find an oil catch can that I liked, and I hunted high and low. However, my persistent searching did expose me to a lot of features I wanted to incorporate, so it wasn't a complete waste of time at least. For all of the variations out there, it was proving annoyingly difficult to find all of said features in one package. Admittedly, on many an occasion, it was little nit-picky details responsible for making me pass on a catch can. We're talking instances where I wanted male AN fittings instead of female (to eliminate the need for an additional fitting between can and hose) or the provided mounting solution (stupid tabbed hose clamps). So, ultimately, I decided it would just be easier to fabricate my own, ensuring it would be tailored to my needs. Plus there is always that little added satisfaction of building it myself.

January 09, 2013

Wastegate, Take 3 (Now With Dump Tube)

After a several month hiatus, I am back with some visible progress. After awhile of picking at projects, I found myself road blocked by welding which I (admittedly) put off for several weeks.


Backing up a bit, in October I had sent out/received my TiAL F38 from a "rebuild". I had had the original wastegate housing powder coated a second time in March, only to experience adhesion issues (chipping) during reassembly. Frustrated, I settled on replacing the housing with one of TiAL's black anodized pieces. This required sending the whole unit in to ensure I wasn't trying to assemble a knock-off. Much to my surprise, the wastegate returned with my damaged housing. Now I have the convenience of a spare should I attempt to powder coat again. One more disassembly was required to clock the housing so the side port was in the right position - hopefully I don't have to take this thing back apart for awhile. Onto the dump tube.

September 07, 2012

Bumper Trimming

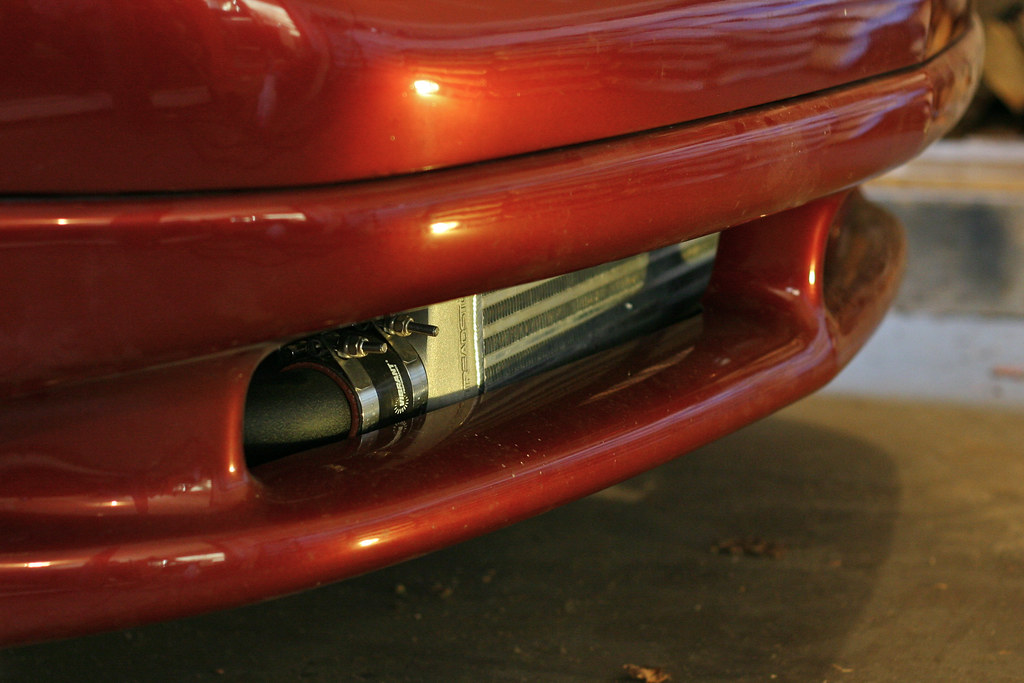
As mentioned in an older post, the nose of the car would no long fit over the intercooler.


To remedy this required some trimming of both the bumper and lower reinforcement (I was certain that I had taken pictures of the modified reinforcement, but have been able to find them). The lower reinforcement is a plastic piece that used to include the grill (cutting this out was one of my earlier modifications) and simply holds the lowest portion of the bumper in place. To clear the intercooler I ended up cutting away a majority of it. 

July 25, 2012

New Axles

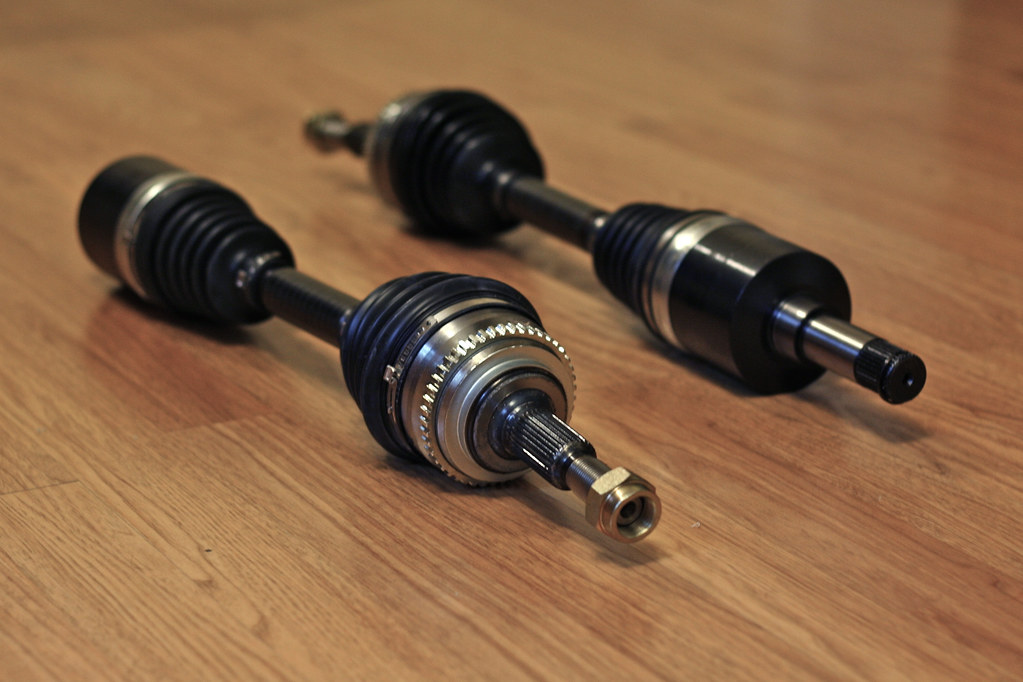
A few weeks ago the car donated another perfectly good part to keep downtime with the daily to a minimum.


On a drive home from Portland, ME (about 35 minutes north of my home in Wells) the passenger side front of the SW started exhibiting a vibration at speed, with a distinct clunk every time the clutch was engaged or depressed - a bad CV joint loading and unloading. I was short on time with a looming alignment appointment, so I jacked the SL2 up and swiped the passenger side axle to get the daily squared away. I turned this into an excuse to purchase a new set of axles for the SL2. Given the mileage on the SW I'd gamble the drivers side axle may not be far behind its counterpart, so a fresh pair on the SL will leave me with a good axle left over (hopefully I won't need it anytime soon). Replacement axles for these cars have always been hit or miss as a lot of the reproduction units have inconsistencies. In a lot of instances the CV boots are larger than stock, making them prone to rubbing on various areas of the drivetrain or chassis. I did my homework to narrow the field down to axles others have been successful with, and ended up purchasing a set of EMPI axles through Rock Auto.

July 22, 2012

Vented Cam Cover Preview

This is another long-term project that is finally coming to a close. Once again I've gone overboard for a stock motor build, but I couldn't help myself.


This project started as another "might as well" moment. I knew at the very least I wanted an aluminum cam cover with the full "Twin Cam 16V Saturn" script that was found on the '95 DOHC's for that year only ('94 and early only said "Saturn" while '96 saw the introduction of composite cam covers). Years ago a local Sixthsphere member turned one up for me, only to sit around in the trunk of the car while I tackled other portions of the build. With the intention of getting the car to run this year, I finally unearthed it. By this point I had it in my mind that I was going to build a vented cam cover. I poured over various applications (namely Honda B-series and Mitsubishi 4G63's) for ideas to determine an adequate size and placement of a pair of male AN fittings before choosing -10AN. For some time after I continued to toy with various locations for my fittings until I settled on mimicking the two other vented S-Series cam covers that I knew of - already proven to work right?

June 15, 2012

AEM Air Filter

Not the most thrilling update, but a necessary detail.


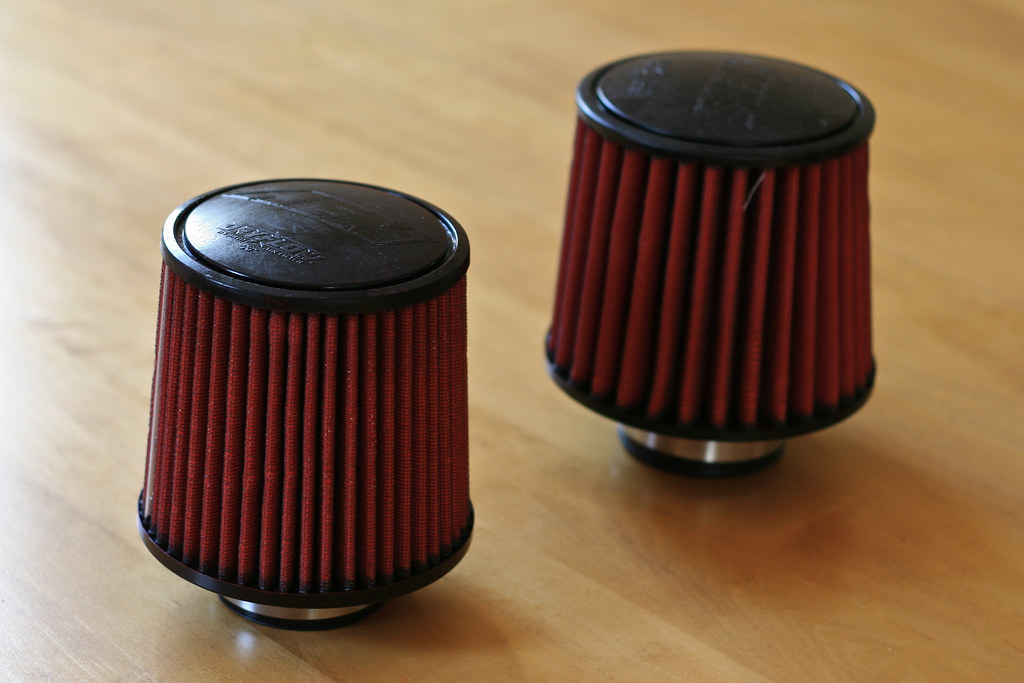
When I designed my intake I mocked up an old oiled AEM filter that was sitting around with an unused AEM cold-air intake. Being that the filters location is in such a tight spot, it was useful not only in designing the route of the tubing, but in ensuring the hood would close. Satisfied, I went ahead and ordered a new dry filter of the same dimensions. When this dry-flow filter arrived I was disappointed to discover it was marginally larger than its oiled counterpart. A test fit confirmed that the first unit would not allow the hood to close without interference. So I went back to the catalog and did some digging around to find a filter that was approximately half an inch smaller in length and overall diameter. This actually worked out quite well as the new AEM dry-flow filter provides better clearance than even the oiled mockup filter. As an added bonus I kept the larger dry-flow filter for whenever I refurbish that AEM intake for the daily.

May 31, 2012

Coolant Junction Pipe

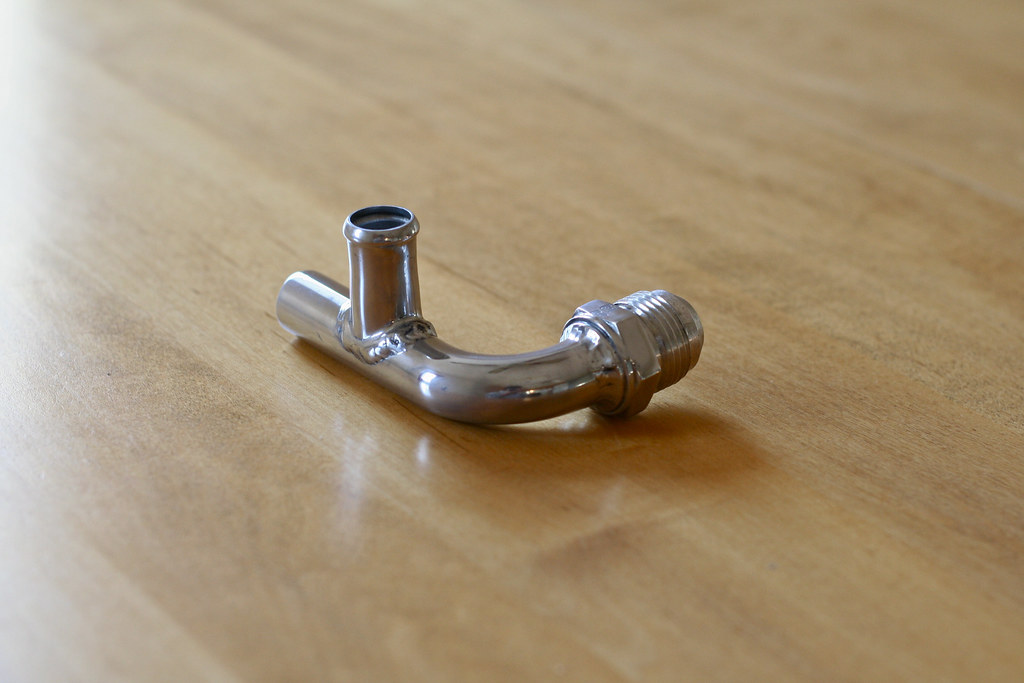
An elaborate solution for a simple problem, all because I didn’t want a coolant bypass hose touching the intake.


When I first mocked up the turbocharger, with my new manifold, it was clear that its position was going to interfere with the original route of the passenger side hoses. The lower radiator hose was modified first, being shortened somewhat, while the thermostat housing was cut up and welded back together. The hose right below it (the one that connects the block to the hardline on the passenger frame rail) was initially shortened so that it ran a little closer to the motor, meeting my original need of clearing the turbo (it can be seen in a picture in this post). Later on while fabricating my intake, it became an issue again, rubbing against the tubing. Being that it wasn’t the best solution in the first place (the molded hose ended up a bit kinked) I started playing with alternatives. Because the hose was trying to make a 45 degree turn off of a straight fitting (on the block) I first tried replacing the stock fitting an Earl’s 45 degree swivel fitting (this required an XRP metric to AN adapter).

May 19, 2012

Front Brake Refresh

This update probably isn't quite as exciting in the grand scheme of things, but it needed to be done. The car had been sitting without front brakes since last summer.


Long story short - I was doing a routine rotor/pad job on the daily and twisting apart sliding pins. Since the SL2 had so few miles and no inclement weather on its brakes, I knew that these parts were definitely good. So, being that I was in a pinch, I ended up "borrowing" the pad cradles and pins, hanging the front calipers in the wheel wells, and that is how she had sat since. Recently I collected new replacement pins, boots, and pad shims to put everything back together. Since everything was coming apart I took the chance to repaint the calipers and FINALLY install my front Goodridge lines. My first task was to get the pad cradles into shape. These, being leftovers from a year round car, were pretty nasty and very crusty. I took them down to good metal with a combination of wire wheels and wire brushes. After a thorough followup cleaning I coated them in Eastwood products - two coats of rust encapsulator and two coats of chassis black. The calipers had been previously painted with Rustoleum satin black, however when I first installed them I did a poor job containing the brake fluid and it wreaked havoc on the finish. After disconnecting the calipers and thoroughly flushing them out I attacked them the same way as the cradles. While these items were curing I set about getting ready to install my Goodridge lines. For weeks I had been applying PB Blaster to the flare nut that connects the hardline to the soft to try making the disconnect as painless as possible. The passenger side came apart with little persuasion, but the drivers side became a headache. I was able to get the stock rubber line unthreaded with some additional heat but the flare nut remained frozen the hardline. Ultimately this made reassembly kind of tricky and the final orientation of the drivers side brake hose isn't perfect. I had a little additional downtime refinishing the L-brackets that keep the brake lines in place, as I couldn't get myself to install fresh Goodridge lines into rusty brackets, but got everything back together today.

May 02, 2012

Oil Filter Relocation

This is another project fresh off the back burner... if you can believe that. Why did I go through the trouble? I won't deny that I totally did it for cleanliness reasons.


In an earlier post I described the finish work and alterations I made to the adapters from a Trans-Dapt oil filter relocation kit. I fully expect some criticism for the final orientation of the oil filter, being that the open end is pointed down. Since this project had always been off to the side I'd never committed to any one spot for the filter to reside. I was a little troubled by the lack of space and the hose provided with the kit wasn't exactly the most flexible in the world. One area that had caught my eye was the real estate left behind by the power steering pump and reservoir. Given the nature of the oil feed and return lines, I began looking at the possibility of mounting the filter upside down, essentially making the hose run vertically. Before I embarked I had to lay my skepticism of a turned over oil filter and spent quite a bit of time wading through other setups. It turns out that the SR 240SX guys have been doing it for years.

April 11, 2012

Vacuum Routing

I think I've developed an obsession with these push-to-connect fittings. I created a decent amount of trouble for myself to run them on both the ends of my vacuum lines.


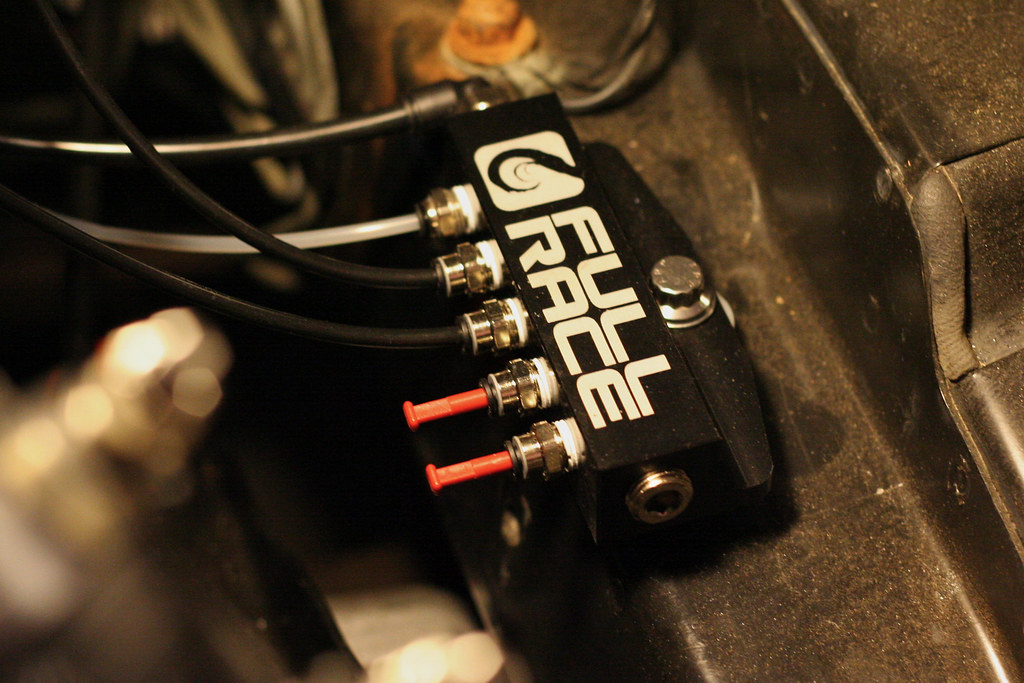
The vacuum block doesn't really need any further explanation, but I'll elaborate on the vacuum fittings. Sourcing push-to-connect style fittings for the five 1/8" NPT ports and 1/4" NPT ports was the easy part. Conjuring up matching fittings for the areas that have no threads was a bit trickier. I was already confronted with this situation when adapting to my vacuum source off of the intake manifold. My solution was a sort of adapter using push-to-connect fitting with a tube stem, instead of threads, in the correct diameter to fit in an old PCV elbow. After a lot of brainstorming I settled on a similar approach for the nipples on the stock FPR and HKS BOV. However, since the stems were designed to work with their outside diameter and I needed the inside diameter, these two areas required a bit more imagination.

March 28, 2012

Powder Coating Batches #1 & #2

I finally picked up my second batch of parts from the powder coaters today! The first batch, well I've had that for about two months now.


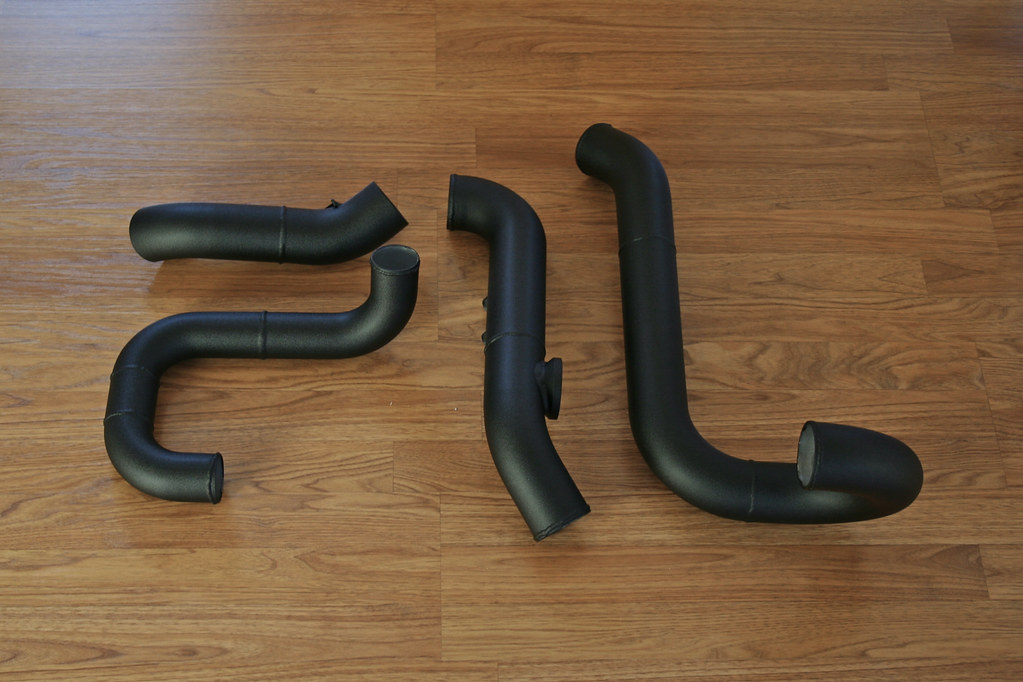
The first batch was entirely made up of intercooler plumbing. When I got it however, I was only able to install so much because batch two included the throttle body (can't really bridge that gap with it). But, now that I have everything back, I can finish installing almost all of my induction stuff. I had a long drawn out self-debate on the final finish for batch one. Originally I had envisioned color matching them to my cam cover, however I struggled to duplicate the color in mind with a powder. Many color samples later it was looking like, to keep the color of choice for the cam cover, I was going to have to turn to paint. So, wanting the durability of powderI finally chose to separate the finish of these pieces. That still left me at the will of my original problem. After looking at a few different builds a certain look started catching my eye; wrinkle black. I was still a little uneasy; I've got a lot of flat black going on in my bay already and couldn't picture sticking a flat black blow-off valve to a black intercooler pipe. But after seeing the color in person I was sold. The wrinkle finish gives this black its own contrast and is dazzling in person.

March 18, 2012

Oil Feed & Drain Lines

Finding time to sit down and post updates. I've had these together since sometime last week.


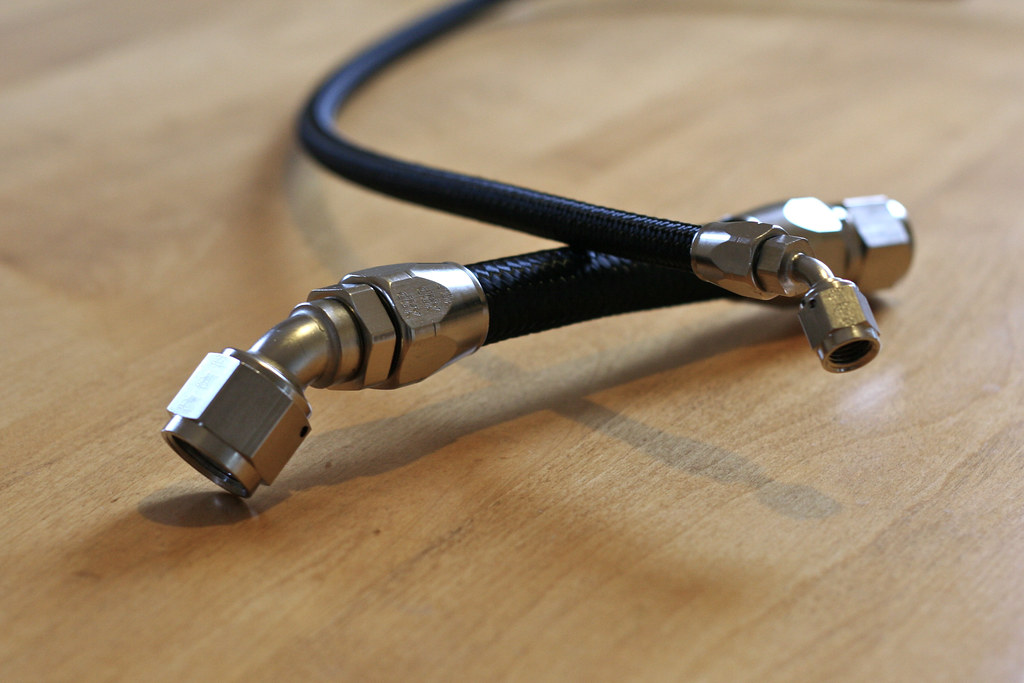
Years ago, after seeing a feature car in DSPORT magazine, I was set on black nylon braided hose with nickel plated hose ends. It was surprisingly difficult to find a company that produced all of the fittings I needed in a matching nickel finish. Earl's didn't provide anything as small as -4AN in nickel, Russell's nylon braided hose had a contrasting tracer on it, and I was extremely iffy about trying out JEGS fittings and hose after reading some skeptical reviews. I was almost ready to track down a plater to refinish any mismatched fittings when I was turned onto XRP. Toby Broadfield, the man behind a S13 Nissan 240SX build I follow, was becoming a distributor and promoting an initial buy-in. After contacting him I waded through the XRP catalog and jumped on board. The quality, fit, and finish has left with no regret in going this route. My first purchase netted me the components to do the oil feed/drain lines for the turbocharger, fittings/hose for my crankcase ventilation project, and a set of aluminum jaws for assembly. The hose is all XRP's XR-31 Lightweight Performance Hose and all fittings are a combination of double-swivel and non-swivel hose ends in the Super Nickel finish.