March 28, 2012

Powder Coating Batches #1 & #2

I finally picked up my second batch of parts from the powder coaters today! The first batch, well I've had that for about two months now.


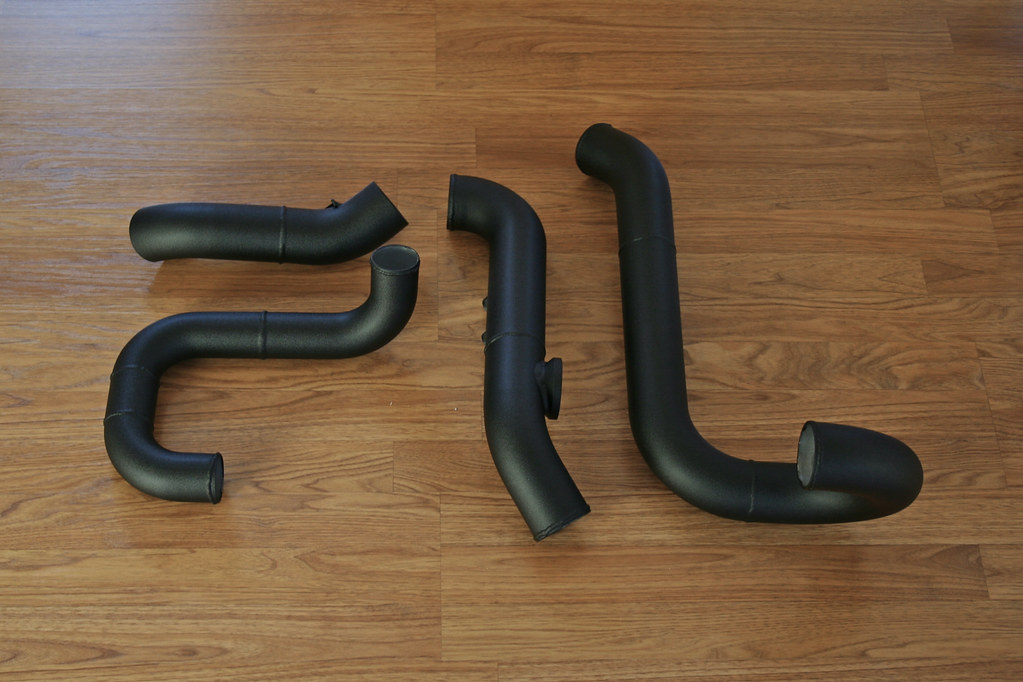
The first batch was entirely made up of intercooler plumbing. When I got it however, I was only able to install so much because batch two included the throttle body (can't really bridge that gap with it). But, now that I have everything back, I can finish installing almost all of my induction stuff. I had a long drawn out self-debate on the final finish for batch one. Originally I had envisioned color matching them to my cam cover, however I struggled to duplicate the color in mind with a powder. Many color samples later it was looking like, to keep the color of choice for the cam cover, I was going to have to turn to paint. So, wanting the durability of powderI finally chose to separate the finish of these pieces. That still left me at the will of my original problem. After looking at a few different builds a certain look started catching my eye; wrinkle black. I was still a little uneasy; I've got a lot of flat black going on in my bay already and couldn't picture sticking a flat black blow-off valve to a black intercooler pipe. But after seeing the color in person I was sold. The wrinkle finish gives this black its own contrast and is dazzling in person.

March 18, 2012

Oil Feed & Drain Lines

Finding time to sit down and post updates. I've had these together since sometime last week.


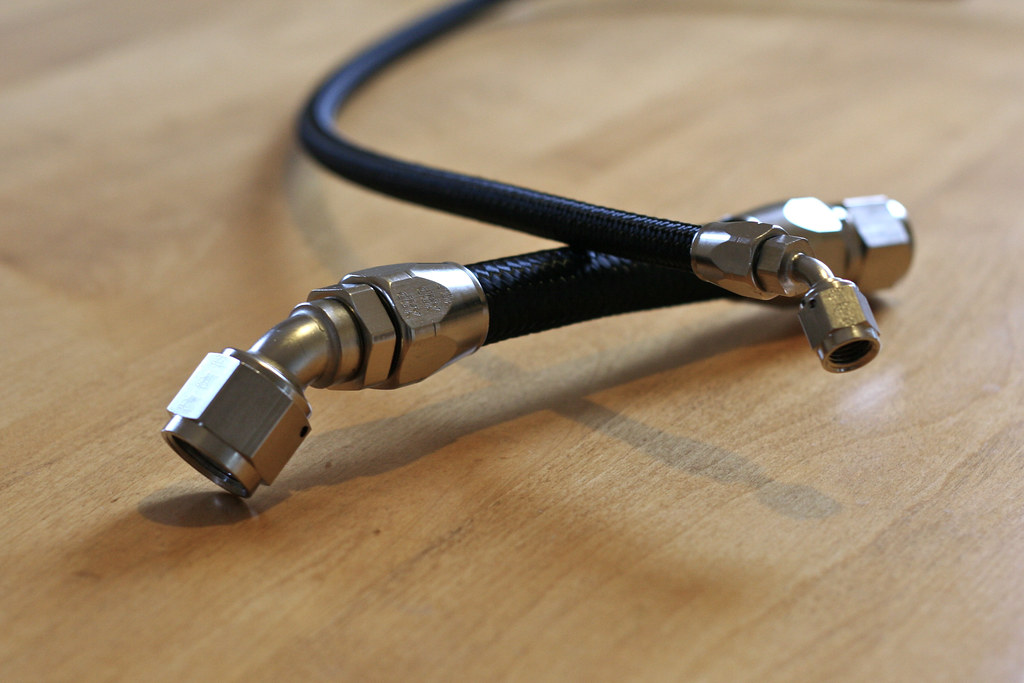
Years ago, after seeing a feature car in DSPORT magazine, I was set on black nylon braided hose with nickel plated hose ends. It was surprisingly difficult to find a company that produced all of the fittings I needed in a matching nickel finish. Earl's didn't provide anything as small as -4AN in nickel, Russell's nylon braided hose had a contrasting tracer on it, and I was extremely iffy about trying out JEGS fittings and hose after reading some skeptical reviews. I was almost ready to track down a plater to refinish any mismatched fittings when I was turned onto XRP. Toby Broadfield, the man behind a S13 Nissan 240SX build I follow, was becoming a distributor and promoting an initial buy-in. After contacting him I waded through the XRP catalog and jumped on board. The quality, fit, and finish has left with no regret in going this route. My first purchase netted me the components to do the oil feed/drain lines for the turbocharger, fittings/hose for my crankcase ventilation project, and a set of aluminum jaws for assembly. The hose is all XRP's XR-31 Lightweight Performance Hose and all fittings are a combination of double-swivel and non-swivel hose ends in the Super Nickel finish.

February 28, 2012

14 Years And 350k Miles

I know, I know... this blog is supposed to focus on the happenings of the SL2, but I felt the need to give the daily driver a touch of the limelight. Today the SW2 reached two milestones - fourteen years in our family and 350,000 miles on the road.


For those that may not know, this '95 Saturn SW2 is my third daily driver following in the line of a decrepit '93 SL2 (it was all I could afford) and a '96 SC2 (it was becoming too much like another project. As of January 21st it resides in Rosendale, NY). My acquisition of the SW2 heavily overlapped a long hiatus of driving the coupe. It quickly became the regular fall back vehicle while I struggled to make the SC2 orderly. As problems continued to crop up, the more I'd find myself driving the wagon. Eventually I became frustrated enough with the coupe to throw a for-sale sign on it (in retrospect, even if I had made the coupe road worthy it still would have needed too much work for my to be happy with it). Prior, the SW2 had been regular transportation for my Dad. He purchased it on February 28th,1997 with only 41,920 miles. In 1997 this car still sold for $14,735 dollars, compared to the $1300 eventually paid for my SL2. Unbeknownst to me, this car would go on to influence my admission to the Saturn community and the purchase of the SL2 that this blog is all about. Around that time the local Saturn dealership (Portsmouth, NH) was an SPS distributor and was sponsoring an employee's race-prepped '96 SL2, a car that Dad became lightly involved in. Dad, despite having vowed to "never lay a wrench on it", quickly started duplicating basic modifications from the SPS catalog - I recall walking in on him with the shifter in the vice and a hacksaw in hand. These modifications would go on to include a lot of one-off pieces, namely the tubular stainless steel rear lateral-links and trailing arms that stirred the forums. This car also features the original hand made center vent gauge bezel that was briefly replicated and made available for sale.

Vacuum Routing Preview

I've been sitting on a lot of things here and there, waiting for accompanying bits and pieces to arrive in the mail.


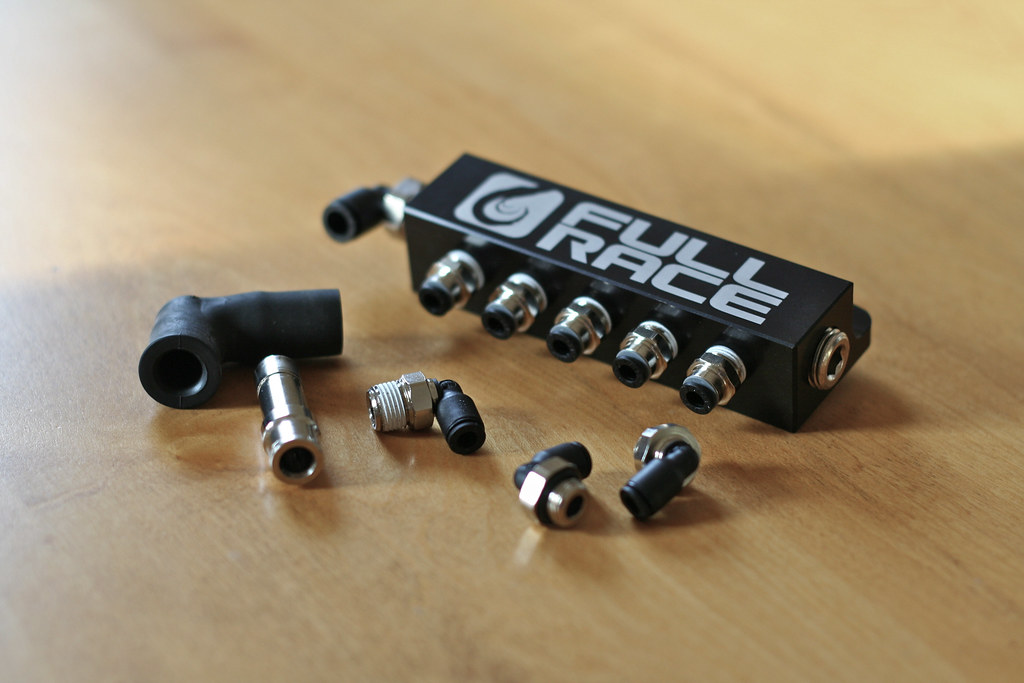
One of these items is the vacuum block pictured here. I sought out an over-the-top piece from Full-Race. Then I turned around and disassembled the hardware it came with. For my routing I wanted something a little nicer than running hose between hose barbs but wasn't quite willing to drop coin on AN fittings and lines. Some while back I stumbled upon a great compromise while perusing a build thread on a different forum; push-to-connect fittings. Mine all came from McMaster-Carr. As an added bonus the brass comes nickel plated! You'll see why thats important a little later. Toward the left of the shot is my solution for the vacuum feed. When I refurbished the intake manifold (some time ago) I removed the steel barbs and replaced them with some brass barbs I had a friend machine up. Later when I decided to go with the push-to-connect fittings I discovered that I had used a really strange thread that couldn't be found. So I cobbled together an alternative. After some digging through the endless parts bin of McMaster I found a barbed push-to-connect and ordered it with a 10 mm diameter stem. To make the right angle off of the intake manifold I pillaged an old PCV line for a rubber elbow. After shortening the fitting to fit the end I wanted I pressed it together; 10 mm is hair large so the assembly won't be coming apart any time soon. Floating around in the foreground of the photo are some additional fittings for the compressor housing on the turbocharger, and the wastegate housing. I don't have the actual vacuum line yet. I wanted to get everything else set up so I could order appropriate lenghts. The feed off of the manifold will be 6 mm while the plumbing off the vaccum block will be all 4 mm.

December 10, 2011

Intercooler Plumbing Preview

These have been welded up for a few weeks now. I've been busy with school finals and haven't had a chance to throw them up here.


Most of the tubing and the blowoff valve flange came from Treadstone while the unpolished piece came from Vibrant (a tighter radius bend to fit between the throttle and the brake reservoir). Welded to that unpolished piece are two Earl's 1/8" NPT bungs for my IAT sensors. It turned out that these bungs were too tall for the sensors, so I actually machined them, then I drilled out the first 1/4" of the threads so I could tap deeper into the piece. The piece on the upper left is the intake. I mocked this up using an old 5" AEM filter (from an old AEM CAI). The filter will reside nicely where the windshield washer reservoir used to be. I fabbed up a nice bracket, that utilizes an old mounting point for the ac-compressor bracket, to support the assembly. I've got a little finish work I want to do to them, then they will be off for powder coating! I'll post more detailed pictures once they're beautified.

November 08, 2011

A Front Mount Intercooler

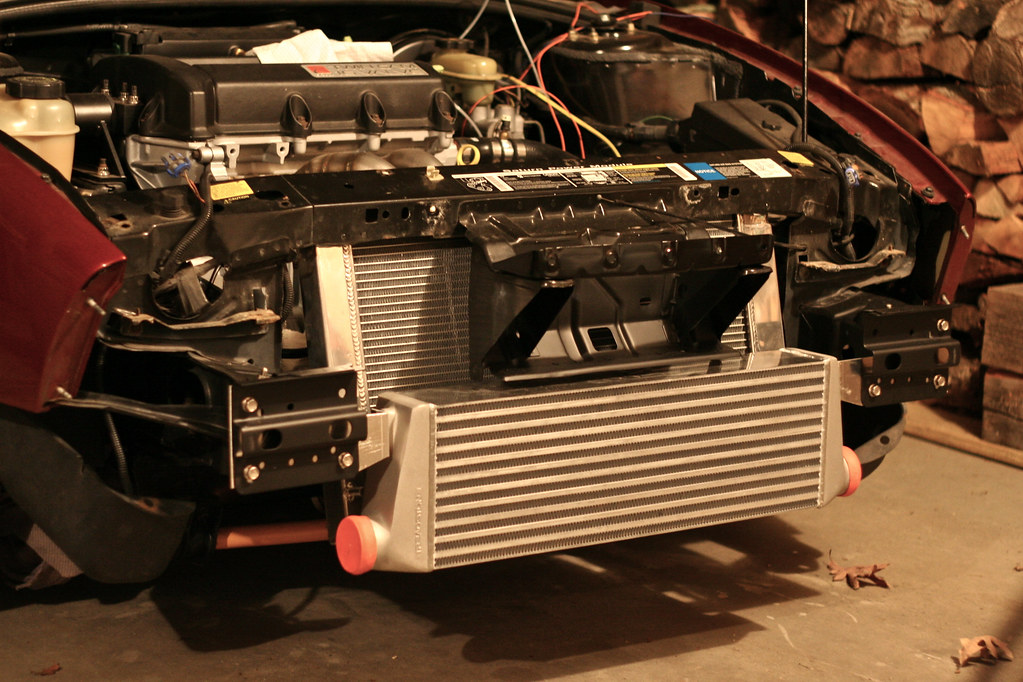
I may have gone a bit large for my initial stock-lower-end setup. What I now have hanging off the nose of the car is a Treadstone TR8L bar and plate front mount intercooler that measures 7.8" x 24" x 3.5" (the TR8L has a core that is 2" longer than the normal TR8). I'm sure a TR8 would have been more than plenty, but without any difference in price (as well as a crazed notion that I will no longer need to upgrade in the future) I was set on the larger of the two.


To make it fit most of the nose was going to have to go. Most people seem to mount their intercoolers between the radiator and front crossmember, however my radiator was already pushed into this free space to clear the turbocharger. So, off came the crash beam with styrofoam, and the lower plastic that supports the bottom of the bumper. Despite the added room it was clear that, with the front crossmember still in place, the intercooler would still sit too far forward.

October 04, 2011

Cooling Solutions

This has been another project I've picked at over the summer. I've waited until it was wrapped up so it'd look like I'd at least gotten something done.


First was the secondary CTS for the MS2. General consensus was the area of choice was a flat spot atop the neck for the upper radiator hose. However I wasn't comfortable drilling/tapping the head while it was still in the car so I hemmed and hawed over a variety of solutions. After nickel and dimeing myself with an assortment of different adapters and tees (non of which fit where the two existing sensors reside) I started shopping around for an inline hose adapter to stick the sensor to. Disgusted by the $30.00+ average I then set out for the more cost effective solution of making my own. This ended up consisting of a bead-rolled 35mm aluminum hose joiner with a 1/8 NPT bung welded to it.